We are focusing on "simple" scrapbooking this week. Yesterday Tina encouraged us in my FAVORITE part of simple scrapbooking, beautiful photos. If you haven't read her post, you should. She is also taking photography questions that she'll answer on Friday.
One way to simplify your scrapbooking experience is to use sketches. There are many sketch sites out there, and really you could use a sketch for every layout you make and never make the same layout twice. Flipping the sketch, or turning them 180* can make a whole new look out of the same sketch.
Here are some of our favorite sketch sites:
Becky Fleck Page Maps
Split Coast Stampers Sketches
Becky Higgins CK Sketches
Pencil Lines Sketch Challenge Blog
For this challenge we commissioned our fearless leader April to make us a sketch.. We also asked a few of our favorite "simple scrapper" members for their take on this fabulous sketch.
Here is April's sketch:
Here are a few takes on the sketch:
by Michelle
by Nikki
by Severine
by Waleska
Tina and I decided to take on the sketch challenge ourselves. Mine is sitting next to me, my scanner is down and my camera is with my husband, but here's Tina's. Mine will be posted later on tonight.
Join us in this challenge and post your layout in the SC gallery by next Monday, April, 6, and we'll pick someone to receive a fabulous SC prize :)
March 31, 2009
March 30, 2009
Photography stuff.
There have been a lot of discussions in the SC Forums lately about photography, from cameras to photography books to Photoshop and PSE. It's a given that photography and scrapbooking go hand-in-hand. And many of us grew in our photography in order to improve our scrapbooking. At least that's how it was for me.
In my own little world, there are no secrets about taking great pictures. Anyone with any kind of camera can take great pictures. Do you need an expensive, complicated, trendy camera to take a great photo? No! But here are some things that might help:
The Rule of Thirds. This rule applies to most visual media, not just photography. But the gist of it is that you want the subject of your photo (or your subject's eyes) to be along one of the grid lines or at an intersection of two lines. I agree with what is stated on the linked page. That this rule can be broken with excellent results. But this basic rule is a good one.
Read your manual. That's the manual that came with your camera. READ IT, front to back, and carry it with you. Whether you have a point-and-shoot or a DSLR camera (DSLR - digital single lens reflex), there are important things for you know about your camera. There are probably things your camera can do that you weren't even aware of. So break it open and read it.
As a companion to your manual, check out the Magic Lantern guides to see if there is one for your camera. I have one for my 5D and I am always referring to it.
Practice. If you've read any of my forum or blog posts, one of the best ways to get better at photography is to practice your brains out. Seriously. Take what you learn from reading your manual, a Magic Lantern guide, photographer's websites, etc. and apply it through practice. Not one photographer I know got better at photography without practice.
Take a class. Whether it's an online workshop (like one of Maggie's) or a class at your local community college, it'll be well worth the investment. From photography and camera basics to work flow and Photoshop tips, you'll learn stuff. And that's always good.
Ask questions. There are no secrets to taking good photos. (Did I say that already?) If you have a favorite photographer or three, ask them questions. Most are nice enough to answer questions or at least direct you to where your answer can be found. And if you never ASK, you'll never GET. (Heard that somewhere recently and it stuck.)
Study other photographers' work. Those favorite photographers? Study their work. What is it about their photos that draws you in? Color? Composition? Lighting? Clarity? Effects? Location? Angle? Study their work and try to apply some of those things to your own photography.
Here are some links to some of my favorite photographer's websites:
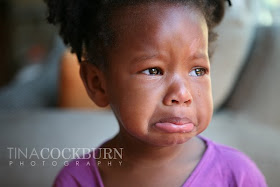
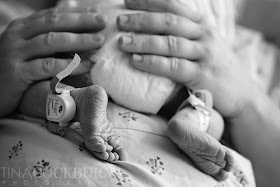
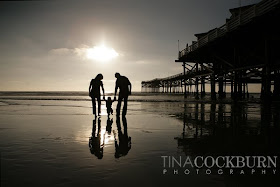
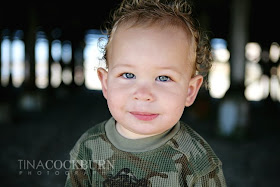
And here are a few of my own favorite photos:
And if you have any questions about photography, cameras or Photoshop this week, leave your questions in the comments section of this post, and I'll have an answer for you on Friday.
Ciao for now!
March 29, 2009
March 28, 2009
Crafty Party Stuff
I was browsing the site of the queen of craftiness (aka Martha Stewart) and just had to share some of the ideas here. I mean...really. How does she (or her cohorts?!) come up with this stuff. Such fun ideas for birthday parties and any party actually.
And of course, a little matching invite. This is so simple, made with just some ribbon and a hole punch, but I thought it was very sweet and could translate well onto a scrapbook page! ;)
So, after the invites and decorations, you might need some party hats to make everyone feel festive. How about these cool ones made with patterned papers and cardstock?! Think of the possibilities! And all the different themes you could use!
You can't have party hats without noise makers, so after you craft together your hats, move on to making these.... I love that you could personalize these for any theme, color scheme, age group, etc.
I've found out that kids really love the favors or treat bags that they get at the party. It's like a little perk after a fun couple of hours. :) I loved this idea for a outdoorsy, exploration, or garden fairy themed party. It's just a little piece of burlap made into a simple sack they can wear on their hip. Then a faux leaf and some acorns were hot glued on. It can be used as a collection bag in a treasure hunt or just to hold the treats. Plus it's better than a little plastic bag in that it can be used again!
This was the first thing that caught my eye... balloon flowers as decorations! Oh, how cute are these for a little girl's tea party or even a bridal shower? (Oh, and if you look up these on the Martha Stewart website you can get full how-to's!)
You can't have party hats without noise makers, so after you craft together your hats, move on to making these.... I love that you could personalize these for any theme, color scheme, age group, etc.
I've found out that kids really love the favors or treat bags that they get at the party. It's like a little perk after a fun couple of hours. :) I loved this idea for a outdoorsy, exploration, or garden fairy themed party. It's just a little piece of burlap made into a simple sack they can wear on their hip. Then a faux leaf and some acorns were hot glued on. It can be used as a collection bag in a treasure hunt or just to hold the treats. Plus it's better than a little plastic bag in that it can be used again!
And finally, this idea... I just love. And I think little kids would get a huge kick out of it too. Especially the birthday boy or girl. Instead of buying all the character or themed party supplies, make your own with some solid colored plates, napkins, etc and a b/w sticker pic of the birthday kid!
That's all for now. I had to stop browsing the 100's of ideas on her site because... well, my family wants to eat dinner. :) Be sure to check it out yourself!
March 27, 2009
Reveal Night Winner!!!!
And the winner of the Boundary Waters punch is.....
Jason and Danielle said...
Yay for giveaways!! So excited for the reveal!
March 26, 2009 3:09 PM
Please send an email by March 2 to info@studiocalico.com in order to claim your prize.
March 26, 2009
Little Girls and Party ideas
Hi there. Davinie here.
As the Mama of two little girls, every year on their birthday I try to make it as fun and special as I can. The problem I have is that both girls are in the winter/Spring, so I can't do the bouncy house or the slip-n-slide party, so most of the time, I need to come up with party themes that are indoors.
Morgan's first year it was simple and I did a pink bear theme. I bought a Wilton bear shaped cake pan, made her a cake, frosted it pink, and then messed up the eyes a bit, so put on some kid-sized shades, lol. I took photos of her with a great big pink stuffed bear, which we still have.
For her second birthday, it was a cowgirl theme. To make decorating easier, I took baby sized denim jeans, overalls, etc., and pinned them together with red checked handkerchiefs in between to make a garland of sorts that I hung around the room. It was really inexpensive, because I already had the clothes, and a really cute touch. Because she was my independent girl, I made cupcakes for the cake, and the treat bags were simply red plastic cups with a hole punched in each side and a handle tied with ribbon.
By her 3rd birthday Morgan had declared herself a princess. And as all princesses deserve, her mama made her a Barbie princess cake. Sleeping beauty to be exact. Just like my mama did when I was young, I made a great big ball gown of a cake, and then stripped Barbie and tossed her in the middle. I then decorated the cake and gave her a top to her outfit. Morgan LOVED this cake, and as it was reminiscent of my childhood, I was rather fond of her too. For a game I picked up foam crowns from Oriental Trading and a bag full of jewels, and the kids decorated crowns for fun.
The fourth birthday it became clear that Morgan wasn't really a fan of cake. She much preferred ice cream. So I made it easier on myself and ordered an Ice Cream cake from 31 flavors, birthday cake ice cream, I think it was called, and she had a ballerina/princess theme yet again. This time the party was tough because there was snow on the ground, so the kids basically wore their princess dresses under their snowsuits, lol. But I had balloons and crepe ribbon in pink and white all over the house.
Morgan's fifth birthday was this year. Her birthday was just days before our family was flying to California for CHA and the kids' first trip to Disneyland, so I had a lot of work to do at my other job to prepare for my absence, and laundry to do, etc., to get ready for our trip, so I didn't have a lot of time to prepare anything fun for her day. On her party day we did something different and met friends at a bowling alley. It was my girls' first time bowling, and they had a blast. After bowling we stopped for ice cream at the Cold Stone Creamery. Morgan had a great time. She also made it easy for me on her actual birthday, too. She had seen this princess cake display at our local grocery store a few times, and declared that she simply MuST have it. It came in this great big princess castle box and had turrets and princess figurines and everything. She really loved that cake, so I feel a little less guilty about not having made any of it.
To celebrate all of my cake making experiences with my sweet girl, I made a layout about all of the cakes:
See that bear cake? You wouldn't have known he was deep-down creepy if I hadn't said anything, would ya? lol It was my first time as a master baker, that cake. I think he looks rather "cooool". hahaha.
Take time to celebrate the cakes in your life, lol. I had a lot of fun digging through the birthday photos from the last five years. I'll be back in a day or two to share what I've done so far for Payton, and a homemade gift or two that I have in the works for her. Her party is on Saturday and her birthday is next Monday! I can't believe she'll be 3.
Davinie
As the Mama of two little girls, every year on their birthday I try to make it as fun and special as I can. The problem I have is that both girls are in the winter/Spring, so I can't do the bouncy house or the slip-n-slide party, so most of the time, I need to come up with party themes that are indoors.
Morgan's first year it was simple and I did a pink bear theme. I bought a Wilton bear shaped cake pan, made her a cake, frosted it pink, and then messed up the eyes a bit, so put on some kid-sized shades, lol. I took photos of her with a great big pink stuffed bear, which we still have.
For her second birthday, it was a cowgirl theme. To make decorating easier, I took baby sized denim jeans, overalls, etc., and pinned them together with red checked handkerchiefs in between to make a garland of sorts that I hung around the room. It was really inexpensive, because I already had the clothes, and a really cute touch. Because she was my independent girl, I made cupcakes for the cake, and the treat bags were simply red plastic cups with a hole punched in each side and a handle tied with ribbon.
By her 3rd birthday Morgan had declared herself a princess. And as all princesses deserve, her mama made her a Barbie princess cake. Sleeping beauty to be exact. Just like my mama did when I was young, I made a great big ball gown of a cake, and then stripped Barbie and tossed her in the middle. I then decorated the cake and gave her a top to her outfit. Morgan LOVED this cake, and as it was reminiscent of my childhood, I was rather fond of her too. For a game I picked up foam crowns from Oriental Trading and a bag full of jewels, and the kids decorated crowns for fun.
The fourth birthday it became clear that Morgan wasn't really a fan of cake. She much preferred ice cream. So I made it easier on myself and ordered an Ice Cream cake from 31 flavors, birthday cake ice cream, I think it was called, and she had a ballerina/princess theme yet again. This time the party was tough because there was snow on the ground, so the kids basically wore their princess dresses under their snowsuits, lol. But I had balloons and crepe ribbon in pink and white all over the house.
Morgan's fifth birthday was this year. Her birthday was just days before our family was flying to California for CHA and the kids' first trip to Disneyland, so I had a lot of work to do at my other job to prepare for my absence, and laundry to do, etc., to get ready for our trip, so I didn't have a lot of time to prepare anything fun for her day. On her party day we did something different and met friends at a bowling alley. It was my girls' first time bowling, and they had a blast. After bowling we stopped for ice cream at the Cold Stone Creamery. Morgan had a great time. She also made it easy for me on her actual birthday, too. She had seen this princess cake display at our local grocery store a few times, and declared that she simply MuST have it. It came in this great big princess castle box and had turrets and princess figurines and everything. She really loved that cake, so I feel a little less guilty about not having made any of it.
To celebrate all of my cake making experiences with my sweet girl, I made a layout about all of the cakes:
See that bear cake? You wouldn't have known he was deep-down creepy if I hadn't said anything, would ya? lol It was my first time as a master baker, that cake. I think he looks rather "cooool". hahaha.
Take time to celebrate the cakes in your life, lol. I had a lot of fun digging through the birthday photos from the last five years. I'll be back in a day or two to share what I've done so far for Payton, and a homemade gift or two that I have in the works for her. Her party is on Saturday and her birthday is next Monday! I can't believe she'll be 3.
Davinie
Reveal Night Giveaway!!!
Just post a comment here and we'll draw a winner at 12:00am on Friday Night when April's kit is revealed. To see a sneak peek look here.
Also, we're still having unclaimed prizes, so don't forget to look back to old giveaways and see if you're a winner. And, if you haven't yet, you may sign up to receive email updates of this blog so you don't have to remember to check back for winners. Just sign up via the Feedburner link on the right.
March 24, 2009
Party Games
Yes, I know my post today is not so crafty or scrapbook-related...but a couple people mentioned they would like to know more about the games we played at the Superhero party. I used google quite a bit to find ideas for these and then adapted them to fit our theme. You don't have to reinvent the wheel! I also found that 3 games was plenty in a 2 hour party. I thought I'd need more...but they just wanted to PLAY together and chase each other around, etc. So we had down time for them to do that. Plus, I had some oversized (like poster sized) coloring sheets of Batman which I found at Walmart that were very cool and some kids chose to work on one of those to take home and put up on their bedroom wall. It was a mixture of structure and just play time. Which worked for us and the group we had.
3. Superhero Stomp. This last one was another fun game that had them all giggling and screaming. I broke them up into two teams and the game is basically a relay race. Each kids was given a balloon (regular not helium) that was blown up. They were really large balloons too! The first member of each team had to run down to the marked area and try to pop their balloon before running back and tagging the next person on their team. Some kids popped theirs right away by stomping on them. Some were trying to jump on them, sit on them, etc. And some just couldn't get them to pop! (I had my husband down at that end to give a helpful stomp to any kids who were really struggling to pop them.) It was pretty amusing to watch them rolling and jumping all over these balloons. Plus, it was loud with all the popping and we all know how a bunch of boys love all things LOUD. :)
And that's it. Like I said, the rest of the time was spent on cake, presents, and just running around outside. Luckily it was a nice day!!!
Here's a run-down of the games...
1. Pass the Kryptonite. Just like hot potato, except we used a good sized piece of lumpy, bumpy coral we had and painted it bright green to be the strength-zapping kryptonite.
2. Spiderman Web Tie Up. This one I came up with on my own. :) I volunteered my own Superman (aka, my hubby!) for this one to be the "villian". The kids worked in teams of 2-3. Each team had a roll of black crepe paper and 2 minutes to see how well they could "tie" the villian to the chair. Then after the 2 minutes were up, I timed how long it took the villian to completely break free. Of course, he hammed it up for the crowd and made it look really hard to break out of the web. The kids LOVED this and all the spectators were chanting, "TIE HIM UP, TIE HIM UP!" while the team worked. They also got into counting down the last 2o seconds for each team. Here's a pic of one team in action.
And that's it. Like I said, the rest of the time was spent on cake, presents, and just running around outside. Luckily it was a nice day!!!
March 23, 2009
You Are Invited...
to a week of birthdays with Davinie and myself! We have both been busy this month planning birthday parties and events, so we figured why not share what we've come up with on the blog this week? I hope we can share some ideas and projects that might inspire you to get creative with the birthdays in your household. And don't forget to email us or p.m. us with any ideas you have too...we'd love to hear what you've come up with!
We had 10 boys there, all 5 or 6 years old. All in full superhero get-up and character...ready to be rough, tumble, and LOUD! I love this shot of Cate...she was a little overwhelmed by it all!
They all had a blast and I think we were all exhausted by the end of the 2 hours! :) Are girl parties quieter? I'm really hoping so!
Okay, so for the past week I've been working on getting this party organized for my twin boys. Their 6th birthday was actually in early March, but we wanted to hold the party at the clubhouse in our neighborhood and it wasn't available until yesterday. They decided that they wanted to have a Superhero themed party and since they love to dress up they wanted everyone to come decked out in superhero costume. We first started with the invitations. I made 12 invitations for about $1.50 and that included the cost of 2 stamps! I found a booklet of superhero stickers (they are very small, but perfect for this kind of project) at the dollar store. Then I just used cardstock from my stash, stamps, and the want ad section from our newspaper. So easy and CHEAP!!! (the party info was just printed on the back side)
Next we came up with superhero themed games... Pass the Kryptonite, Spiderman Web Tie-Up, and Superhero Stomp. Just ask me if you need clarification on those. LOL For decorations, I kept it simple and again...CHEAP. I made simple "POW", "BAM" type signs to hang on the door and on the balloons. Getting plain helium balloons and dressing them up with these signs was much cheaper than getting the fancy character helium ones. For table decorations we again used what we already had... comic books, superhero action figures and toys. The plus is that the kids then used those to play with during transitions. Here's a shot of my two superheroes before the party started...
Anyways, let us in on any of your great tips/pointers/ideas for birthdays. And it doesn't have to be just parties. If you have have cool gift projects, cards, etc...we'd love to see them and share them here on the blog! Have a great night!
March 21, 2009
a week of member mania draws to a close...
with our last 2 featured members.
i have to say, it was definitely hard for Steph and i to choose just 2 a day...and hopefully everyone has enjoyed seeing these wonderful layouts that may have been missed along the way.
first up today...SIMPLYTAM!!!
i'm a sucker for white cardstock, and the colors she used here make me smile. look at that pic!! digging the distressing here...
and i love this series of action shots, lol! she is amazing with little details as well.
the angle of the photos is what caught my eye on this one...and of course those cutie patootie clouds.
now THIS is a perfect way to use that SC exclusive dress pattern paper...my socks have officially been knocked off!!
i have to say, it was definitely hard for Steph and i to choose just 2 a day...and hopefully everyone has enjoyed seeing these wonderful layouts that may have been missed along the way.
first up today...SIMPLYTAM!!!
i'm a sucker for white cardstock, and the colors she used here make me smile. look at that pic!! digging the distressing here...
and i love this series of action shots, lol! she is amazing with little details as well.
and last, but by no means least...HAGGITH!!!
stitching? check.
tidbits around the edge? check.
blue and green? check.
love it!!
the angle of the photos is what caught my eye on this one...and of course those cutie patootie clouds.
now THIS is a perfect way to use that SC exclusive dress pattern paper...my socks have officially been knocked off!!
please check out her gallery HERE.
again...HUGE thanks to everyone for uploading their work to our gallery. it never fails to amaze us, seeing what everybody does with the same goodies. we hope you enjoyed this week...enjoy!!
March 20, 2009
More More More
More member appreciation today!
I don't know about you, but I, for one, just can't get enough!!
I want to start off with LaBelleMichelle.
She's young, spunky, and cute, and her layouts are always injected with humor.
Here are three of my favorites out of her gallery.
1. I love that she used a sorority photo here. Makes me want to dig up mine! Look how she used all of the pretty patterned paper in such a sweet design. Lovely layout, Michelle!!
2. This is just a happy, fun layout. The colors are beautiful, the topic is giggle-worthy, and I adore that sweet floral accent.
3. This is a beautiful layout. The photo is stunning, I love the choice of using an oversized photograph. It's eye catching and classic. Check out the way she used the Fiskars "Upper Crest" punch...I need to remember that idea, b/c it is fantastic. Fresh, pretty LO!
It was hard to pick only three! Thanks for the inspiration, Michelle. =)
Find her gallery HERE.
My second member choice for the day is the fantastic Hera!
Hera is one of our sweet members from Switzerland. Her layouts always provide inspiration, especially in her beautiful detail work.
1. I love the darling little paper-pieced accents here. The JBS apothecary stickers are also used in such an inventive way. Love it!
2. These flowers are stunning. I mean, really they make my heart happy. And look at the touches of baker's twine. Oooh La La! A true work of art.
3. I really appreciate the monochromatic title work with the pop of orange. So pretty. And look at how she used our packaging to
make a sweet, one of a kind accent. Yet another creative page.
You can find Hera's gallery HERE.
Hera, thanks for sharing your beautiful layouts with us and for being a part of the SC community!
And thanks to all of YOU reading our member spotlight for the day.
I hope you found some inspiration through these lovely ladies. I know I did!
xo
s
March 19, 2009
Thursday's Member Lovin'
Hey y'all! It's Stephanie, coming at you with our member inspiration for the day!
Hope you are having a fabulous day so far...
It's almost Friday. Yippeee!!!
First I wanted to feature Jenni(jgj27).
Not only is she sweet as pie and such a huge asset to the boards (she's just a joy to have around),
but check out these layouts!
1. This is just the coolest design ever. 2 pagers are hard for me, and i love when i can find inspiration from well-designed two page layouts. This one is very pleasing to the eye and i LOVE how many photos she fit in. The title work/journaling is super cute as well.
2. I am loving this circle design. The way jenni added journaling to some of the circles (and also little doodled accents) is fantastic. i also love how she incorporated the studio calico strip from the PP into her design. Awesome, jenni!
3. This one just makes my heart happy. The quirky touches, colors, scallops, and the way she rocked that SC stamp. Not to mention the subject matter. Like I said, this one makes me very happy!
Thanks so much for being a part of our SC world, Jenni! You can find Jenni's gallery HERE and her blog HERE!
Next up is the fabulous Hanna (hannal)!!!
Hanna is another blessing to our community and we are so glad to have her here!
Strolling through her gallery is so much fun, there's boundless inspiration to be found. She rocks the SC stamps BIG time.
1. This simple, graphic design is super appealing to me. Love that typed journaling and how cute are the coffee cups? Love how you used those accents, Hanna!
2. This layout might be my favorite in Hanna's gallery. The flowers (to die for), the paint, the amazing stamping (uh, can you come teach me??).
sigh
sigh
sigh.
3. Last but not least is this precious layout. I especially like the sweet/playful paper pieced heart, and the incredible journaling combining that BG chipboard that i love and that amazing stamping, yet again.
Thank you so much for being a part of SC, Hanna.
You can find Hanna's gallery HERE and her blog HERE.
Check in tomorrow for more eye candy from our lovely members,
and like Nik said...you never know, it just might be you!!
xo
s
March 18, 2009
Member Love...Day 2.
continuing on with our theme this week...more member love!!
today, our first featured member is CASSANDRA!!!
i love the 'randomness' of this layout...the little tidbits floating off of the top, the stamped border, the way she outlined a few letters...beautiful. and this one...look how cool those punched circles are, let alone the stitched border!
today, our first featured member is CASSANDRA!!!
i love the 'randomness' of this layout...the little tidbits floating off of the top, the stamped border, the way she outlined a few letters...beautiful. and this one...look how cool those punched circles are, let alone the stitched border!
this was cool how she used the SC paper...my first instinct was to separate all of the strips, but look how cool they are used this way instead. one other thing that is neat about her work are the dates printed on each photo...very handy.
our second featured member today is BRENDA HURD!!! (aka mammascrapper)
take a few minutes and check out the rest of Cassandra's gallery HERE.
our second featured member today is BRENDA HURD!!! (aka mammascrapper)
i don't even know where to start with this one...the paint, the lines, the buttons? all scream out at me, lol!!
love her journaling her...and the way she snuck a few buttons inside of those circles.
this quote that Brenda used is going down in my faves book...truer words couldn't be spoken. and the way she tied all of those little bitty letters by stitching over them?! WOW!!
love her journaling her...and the way she snuck a few buttons inside of those circles.
this quote that Brenda used is going down in my faves book...truer words couldn't be spoken. and the way she tied all of those little bitty letters by stitching over them?! WOW!!
please take a walk through Brenda's gallery HERE.
stay tuned tomorrow for more goodness from our member galleries!!