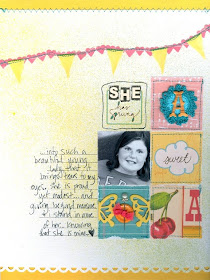
Leila over at Lilibee Studio will be posting a "One Week One Project" tutorial on her blog throughout the week. Leila let us know that this week she happens to be using Studio Calico's Anthology collection. Be sure to check it out! It looks like a lot of fun from this sneak she sent...
March 31, 2010
March 30, 2010
Color Combo Inspiration Abounds!
With Kelly's color combo in mind, I searched the internet for inspiration pieces. You can find them in home decor, your kitchen, your bedding, clothing, and even party supplies:
(Jillian patchwork quilt from Pottery Barn)
(found on Etsy at Trendypeas )
( Egg Fella from the Inside a Black Apple blog)
(party set from MeriMeri )
I hope that helps spark some creativity in you! I also have to say..... my pocketbook is glad I didn't know about MeriMeri before today. Today is Payton's 4th birthday, and if I had seen some of those party ideas last week, you can bet they'd be adorning my kitchen table and her cake right now. SUCH cute ideas there.
Have a great night! Davinie
March 29, 2010
Reveal Night Winner!
la zaz said...
Cool giveaway, love the new collections
March 26, 2010 1:50 PM
Please send an email to info@studiocalico.com with the following information:
- Name:
- Address:
- Subscriber or not? y/n
- Contest: Reveal Night Giveaway
- Prize Won: Sassafras 6x6" paper pads
Color Combo Challenge!
Good afternoon, SC friends! I hope you all had a great weekend. Davinie and I are hosting the blog this week and we thought we'd kick it off with a fun challenge. Since Spring is here and fun bright colors seem to be popping up everywhere in scrapping, home decor, etc....how about a color challenge?
There are no rules here...just make the majority of your layout/project using these colors:
(from www.colorcombos.com)
***For some reason Blogger is acting up today....here's the link to the color combo...hopefully the picture will show up here once things get worked out with Blogger.***
I'll post my challenge layout here on Friday. We'd love it if you would play along too! Be sure to upload your layout to the gallery and link us up here. We'll post a winner on Sunday and the winner will receive a $5 SC gift certificate. :)
Sunday Sketch
A very simple sketch this week utilizing one 4x6" photo. Beside the photo, Davinie included a cluster of embellishments, and underneath, a few layers borders.
Her title sits right on top of the ribbon, so there's lots of layers and textures in this sketch.
Now it's your turn. Take this sketch and change it as much as you like, or copy it exactly and post a link to your layout in this thread for a chance to win one of 2 $5 gift cards to StudioCalico.com.
Layout of the Week
The layout of the week is brought to you by Amanda Pierce (mandielou).
Each week, the layout in the gallery is linked, so you can add it to your favorites easily.
This layout has been added to your favorites more than any other layout in the SC community gallery for the week of 3/21-3/27.
Congratulations Amanda! Because of this you have won a $10 gift card to be used on any new purchase at Studio Calico.
Want a chance to win next week? Be sure to upload your projects to the SC gallery, and support your community by adding special projects that catch your eye into your favorites! It could be YOU next week!
Please note, winners are not allowed to win more than once in a four-week period.
Winners are not limited to those using Studio Calico kits.
Sunday Sketch Winners
Stamp Challenge Winner
Thank you all so much for playing along. I loved seeing all the SC stamps you used :)
The (random) winner is Geralyn:
Congratulations!!
The (random) winner is Geralyn:
Congratulations!!
March 27, 2010
Favorites!
Hi everyone.... Susan here again today :)
Since we'll be welcoming in the new April kit "Joyland" at midnight tonight, I thought I'd take a moment to post a few of my member favorite layouts from this month's "Quilting Bee" kit...
here they are! :)
Daddy Smackdown - by KimA > love love LOVE the series of photos on Kim's page, and the bright red veneer sunburst, the dimension that was added to the banner sticker, and the little splattering of mist (which is the perfect background accent to plain kraft cardstock!).
Pa toppen - by SarahDK > i think that Sarah's combo of ripping, punching, layering, & stitching is beyond gorgeous! One of my absolute favorite pages of the gallery... and i also love how she covered her chipboard buttons with scraps of patterned paper - so fabulous!!!
Snow Shine - by Lynn Ghahry > One word. AMAZING. i love LOVE how lynn used the Studio Calico exclusive papers from March to create the bulk of this page. The orange/yellow stripes plus blue doily print work so well together!!! And for a "boy" page at that ;) The twine threaded through the chipboard buttons that accent the snowflakes is just the right touch....!!! :)
So those were just a few of my faves this month.... can't wait to see what everyone does with the Joyland kit!!!
:)
March 26, 2010
Reveal Night Giveaway
Member Spotlight: Denise
Today I want to highlight one fantastic member: DeniseN!
She is fun, funny and one of the sweetest, nicest girl I've ever met (online. unfortunately, I haven't had the pleasure to meet her in person)... and she's got awesome talent too!
Check out these wonderful pages... they are sweet (and colorful!) and always make me smile.
She is fun, funny and one of the sweetest, nicest girl I've ever met (online. unfortunately, I haven't had the pleasure to meet her in person)... and she's got awesome talent too!
Check out these wonderful pages... they are sweet (and colorful!) and always make me smile.
March 25, 2010
Insider Tips: Sass Frames
I had a few people ask about the frames in my 'all kinds of cool' layout so here's a little 'how to':
using the Sassafras 'Spring Sprig' paper from Honeycomb cut all the way around the edgesthis is what it look like once you're done (you can make it bigger, wider, longer... depending on the size of your picture or whatever you want to use it for)
cut one single frame and with scissors (or an exacto knife if you are good with it) cut out the inside
finally, use glue dots or 3D dots to adhere it to the backgroundrepeat steps 3-5 using different patterns...
easy, right? please let me know if you have any questions.
(and coincidentally, this layout uses 3 different SC stamps... perfect for this week's challenge ;))
using the Sassafras 'Spring Sprig' paper from Honeycomb cut all the way around the edgesthis is what it look like once you're done (you can make it bigger, wider, longer... depending on the size of your picture or whatever you want to use it for)
cut one single frame and with scissors (or an exacto knife if you are good with it) cut out the inside
pick any pattern paper you wish to use (in this case the reverse of the frame's paper) and trace the inside of the frame with a pencil (so you can erase the lines later)
finally, use glue dots or 3D dots to adhere it to the backgroundrepeat steps 3-5 using different patterns...
and the end result is something like this
easy, right? please let me know if you have any questions.
(and coincidentally, this layout uses 3 different SC stamps... perfect for this week's challenge ;))
March 24, 2010
Tutorial: Fabric Scraps!
Susan here again today, with a fun little tutorial involving fabric scraps...
My office is a mix of scrapbooking paper products and sewing/fabric goodness. I have boxes and bags of fabric scraps (from past sewing projects) that I can't bear to throw away. Instead, I've found a variety of ways to incorporate the fabric scraps into my paper projects.
This spring card that I made will demonstrate three different fabric scrap techniques...
FABRIC FLOWER:
The first technique is a super simple fabric flower. Start by punching a large circle from cardstock - this circle punch would work great. Next gather a variety of small fabric strips, loop them in half, and adhere around the punched circle. This adhesive in the shop would work well.
After adhering fabric scrap loops around the circle, flip it over.
Punch another circle in the same size, and adhere to the top of your fabric flower base.
Accent the center of your flower with smaller punched circles (from cardstock), or scalloped punched circles, and even with small crocheted flowers and rhinestones. 3D Dots work really well for adding extra dimension in your flower centers!
Here is a peek of the finished scrappy fabric flower on my card! :)
FABRIC RUFFLE:
The second scrappy fabric technique on my card is a fabric ruffle. This is an easy element to add to either a card or a scrapbook page. Start with a strip of fabric that is at least double the length of the card or page that you will be stretching it across. Using a strip that is folded in half lengthwise (like my green gingham strip) will add additional volume to your ruffle.
Lay ruffle strip along your card and start stitching at one end. I start with a straight stitch up until the point where I'd like my first ruffle pleat. Also, I find it easiest to work with my sewing machine needle set to stop in the downward position (if this is an option on your machine).
Then I simply stop stitching where I'd like a ruffle pleat, and raise my foot, fold some fabric inward, lower the foot and continue stitching until the next point that I'd like a ruffle pleat at.
Continue this process across the width of your paper project.
Finished ruffle may need to have a few loose thread and ends trimmed once finished.
STAMPING ON FABRIC:
Stamping is the third and final scrappy fabric technique included on my card. Stamping images directly onto fabric is a great way to get yet another use out of your stamp collection.
I'm using stamps from the sentiment stamp set included in April's first add-on - Skycoaster. This is such a fun add-on, and the stamps are so versatile! (hint hint - you don't want to miss out on it on reveal day!)
Stamping onto fabric is very easy - just stamp as you normally would onto paper, but use fabric instead! A few tips: I've found it's best to iron your fabric before stamping, to make sure that there are no creases - and, Staz On Ink works the best on fabric in my experience.
After your card sentiment (or image) is stamped onto fabric, use a sharp pair of scissors to trim your image. Fray edges as desired. Stamped fabric can be glued or sewn to your paper project.
I also added a tiny bird (stamped and embossed) from the new-to-the-shop "Tweets" stamp set, sitting atop my card greeting. LOVE this stamp set - it's absolutely perfect for spring projects!
My finished card... Hope that you enjoyed my scrappy fabric techniques and that you try one out on a project soon!
:) -Susan
March 23, 2010
Quilting Inspo!
Hi everyone! Susan here today, with some of my "favorite-d" photos from Flickr.
I thought it would be fun to share some of these favorite quilting photos in honor of this month's "Quilting Bee" kit...
1. Mini Pinwheels, 2. Block for Stephanie, 3. clothesline quilt, 4. Eeeee! , 5. Baby's Quilt, 6. Scapbuster Quilt, 7. Gelati Quilt Top, 8. STepahine's quilt closer, 9. Bushfire Quilt Project
I LOOOOVE to sew and quilt, and often see my color choices from a recent quilt, mimicked in my scrapbook layouts and projects >> or vice-versa. Flickr is a fabulous place to gather all types of quilting inspo!
:)
Masking Tape challenge winner
Last week's challenge winner is...
SimplyTam !!!
Congratulations my dear! :)
SimplyTam !!!
Congratulations my dear! :)
Thanks to everyone who played along! I was so happy to see that you guys had fun with masking tape! :)
Alexa, you'll receive a $5 gift certificate to SC! Email me at thegreenfrogstudio@mac.com and I'll get your code for the store asap :)
Thank you!
c
March 22, 2010
Challenge- Stamps
Hi everyone. Happy Spring! Susan and I are taking over the blog this week and we came up with a fun idea for today's challenge... use 3 or more (yes, three+) of your favorite SC stamps on a page. See? Fun :)
I created this springy layout using Quilting Bee and a few Studio Calico stamps (Hot Air Balloon, Pinwheel, Buttons, Star/Journal Block). I stamped the the pinwheel and buttons on paper to create flowers and the frame & journal lines directly on the Dear Lizzy fabric paper (it worked great!)
{distressed inks used: wild honey, tumbled glass, rusty hinge and barn door}
So get stamping and link your (new) projects here by Saturday, March 27th (EST) for a chance to win a $5 gift card to the SC shop.
March 21, 2010
Sketchbook Class Giveaway
Want to win this amazing sketch class led by Kelly Purkey?
Just leave a comment here letting us know if you've ever created a layout based on a sketch.
Winner will be chosen Monday, March 22.
Class Information:
Sketchbook is a 12 day class filled with fresh sketches, easy instructions, beautiful examples, and lots of fun. Beginning on March 29th to April 9th, a PDF will be delivered to your inbox each morning so you can work at your own pace. By the end of the class, you'll have a complete sketchbook of 12 sketches and over 30 example layouts. For each of the sketches you'll be receiving an example layout from Kelly Purkey, along with one or more example from a member of the incredible Studio Calico design team.
All of the examples are brand new layouts, exclusive to this class... you won't see them anywhere else! Sketchbook will also include a private message board for questions and sharing ideas, as well as two scheduled chats - all on the awesome Studio Calico website.
To register or see more sneaks, please visit Kelly's blog.
ETA: Winner:
Sabrina L said...
I never have...isn't that horrible? I usually just scrap-lift...so I need to branch out more!
March 21, 2010 1:57 PM
Please send an email to info@studiocalico.com to claim your prize. Please include the following information:
- Name:
- Prize: Sketchbook Class
Sunday Sketch
This week, we have a fun sketch by Nicole Harper. It has a basic design, with the grid of photos and patterned papers, but the banner adds something unexpected.
Notice Nicole's placement of her journaling and title. The title is nestled into one of the squares and the journaling is to the left of the grid. This is a great sketch to flip or flop, so have fun with it!
You have until Saturday evening to post your layouts to this thread. 2 winners will be chosen on Sunday to win $5 gift cards to Studio Calico.
The question has come up several times regarding using these sketches with non-SC products and that is 100% fine. We're here to inspire, so use whatever products you have and link us up!