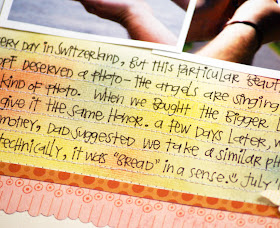
supplies used: blending tool, foam blenders, faded jeans, peeled paint,
and mustard seed distress inks (any distress inks can be used for this project).
Here's a close up of the technique.

I would love to see how you interpret this in your own layouts, it's really fun to see the unique results after each attempt. If you don't own the blending tool yet, it's very reasonable to purchase, and you can use the foam blenders for numerous applications if you stamp it off well.

Great tut Em. I have the same cutting matt as you. I need to try this technique
ReplyDeletegreat technique! greg said you made it look so easy, now he's going to try it :)
ReplyDeleteLove the tutorial Emily!
ReplyDeleteI need to go play!!!!!!
Fantastic, Emily! I actually just bought the blender b/c of your LO. So, this is perfect- thank you! I can't wait to play!
ReplyDeleteGreat job! I didn't know to add a little water to help blend in those "hard blocks"! My inks have been sitting around barely being used....now I can't wait to try your technique!
ReplyDeleteCool effect! Thanks for the tutorial Emily! :-)
ReplyDeleteGreat tutorial Emily. Love the end result!!
ReplyDeleteWhat a cool technique! Thanks for sharing how you did this, Emily!
ReplyDeleteRAD tutorial MLE.
ReplyDeleteBlending tool is now on my to-buy list!
will definately have to try that =)
ReplyDeleteHave just tried this and it's fabulous! Thanks so much for sharing. The inky bits on the edges of the mask look pretty good too, I punched bits out of mine. :)
ReplyDeleteso fun, looking forward to trying this!
ReplyDeleteLove this tutorial! Thanks for sharing! :) :)
ReplyDelete