Hi there! It's Maggie, and I am here to share with you a tutorial on misting!
In case you haven't noticed from a lot of my recent layouts, one of my new favorite techniques is misting. A few months ago I had heard that a lot of people were loving the Maya Mists but I hadn't tried them yet and frankly just wasn't sure if it would even be my thing. Lately I am all about keeping things simple and quick. :) But... I decided to order a couple of bottles of the mist to try it out and see what everyone was raving about. Well, I am here to warn you that it is so much fun and the results are amazing and it isn't even that hard or time consuming! As you can tell, I got hooked instantly and now I am loving all of the fun things I can do with this stuff!!
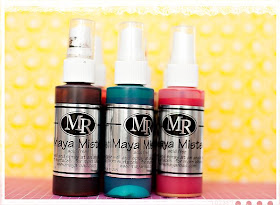
The technique I want to show you today is how to create your own masks and stencils to use with the mists. It is just too much fun and the possibilities are endless!
First I used the Making Memories Slice machine to cut out a star shape (pictured below) and a large circle (not pictured). There are a lot of ways you can go about cutting out shapes... You can trace another shape that you have and cut it out or you can use a chipboard shape or even print a shape and then cut it out. Just be sure that you use heavy cardstock for this (not regular printer paper). When you cut out your shape you will want to cut it right in the middle of a sheet of paper and be sure to save both the negative and positive pieces because you can use both of them with your mists. You can use the negative part as a stencil and you can use the positive part as a mask. I like to cut the shape out of the middle of the paper so that you don't get overspray onto your project when using the negative part as a stencil.
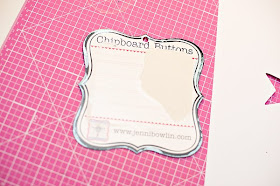
Another thing I used as a mask was this packaging from the Jenni Bowlin Chipboard Buttons. When I see fun shapes like this that I love, I always keep them because you can cover them or paint them to use on a project, you can trace around them to make more shapes, or you can use them as a mask like I will do later on.
 The third mask that I created was a large scalloped border. I used a piece of scrap 12x12 cardstock and used one of my new favorite border punches from EK Success. I punched all the way along one edge to create the border.
You will want to keep a cardboard box on hand to do your misting in so that you don't get mist all over your table or your carpet! That would not be good! It just has to be a little larger than your project. Mine is just one of the Studio Calico boxes that our fabulous kits come in each month. (You can see remnants of other projects I have done, and sometimes I will even do a test run right on the inside of the box!)
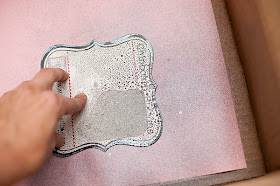
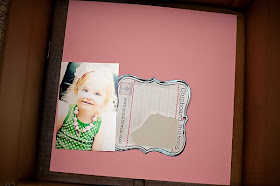
Once you have your masks and/or stencils created you are ready to go! I always get my background paper and my photo(s) and I lay out my page so that I know where I want to do my misting. This helps me to plan my layout and make sure that I leave the correct space for my photo(s). Here I decided that I wanted the label shape to go right next to the photo. I do this right inside the cardboard box so that I can then simply lift the photo off of the page and start misting without worrying about accidentally moving things out of place.
I always hold the mask or stencil in place with one hand and do the misting with the other hand. I try to hold it firmly in place but I don't worry about holding it down too tightly because I don't mind if a little bit of the mist seeps in under the edges. I think it adds to the effect. I always spray the mist from about 8-12 inches away. I like to start out lightly and then spray multiple times to get the right amount, rather than spraying too heavily and then wishing I had done it lighter. Here you can see I just started at one edge of my shape and sprayed a light spray. I also hold the bottle of mist at an angle and spray on an angle while kind of moving my hand across the page, so that the mist flows across the page, rather than just spraying it straight on. (hopefully that makes sense! :) )
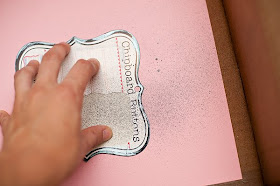 Here is my second spray that I sprayed at the bottom of the shape, again spraying lightly to build and add each layer of mist onto the previous one.
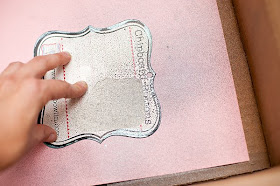 Here you can see that I have sprayed a few more layers of the mist and worked my way around the edges of the entire shape. I sprayed an additional layer of mist near the right and bottom edges because I wanted it to be a little darker in those areas.
 And here is the background page once I have finished spraying and lifted the mask off. I love it! Such a pretty effect and I love the lights and darks and even the little droplets where it sprayed more heavily than in other areas.
For my next layout I wanted to use the star and the circle shapes that I cut with the Slice. Again you can see how I first started by laying out my page and placing my photos where I wanted them. This helped me to figure out where to begin with my misting. On this layout I am going to show you how to layer two shapes and two different colors of mist.
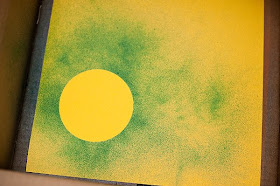 Next I wanted to add some stars so I placed the star where I wanted it - overlapping the circle a bit.
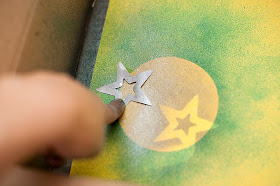 Then I moved it to a third spot and sprayed around that star a few times to make it stand out and to add a bit more silver to the page.
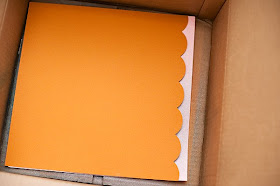
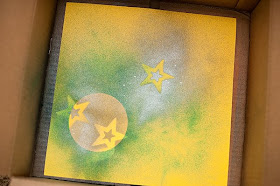 Again, I want to show you how you can use multiple masks and stencils on one layout. I decided that I wanted to use the scalloped border mask that I made on my pink layout so I put my background paper back in the box and positioned the mask so that just a bit of the background is peeking through.
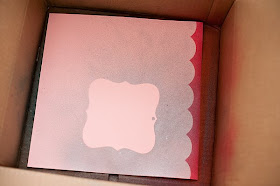
 Then I sprayed all along the edge of the border with pink mist. I sprayed this one a little more heavily to make sure that the pink was nice and dark like I wanted it.
 And finally, here are both of my finished layouts. You can see that I went ahead and placed my photos back in the spots where I had originally planned for them to be. And then it was simply a matter of adding a little bit of this and that until I felt like my layouts were complete. I just love all the things you can do with these mists! There are just so many possibilities and it is so much fun to be able to create your own backgrounds. I love how much impact it has and how artsy it feels! And even though I sometimes do like to keep things a little more simple and easy lately, I always enjoy getting my hands dirty and playing with fun techniques like this!




Beautiful projects Maggies - i especially like your inky fingers ;)
ReplyDeleteOH MY GOLLY GOSH!!! i looove the effects you have created with the masks and mists....just awesome!
ReplyDeleteabsolutely gorgeous projects, maggie! i'm so inspired and I was just misting tonight and am ready to go at it again :)
ReplyDeletei love the idea of making masks with the slice, i had never thought of that before
love it! ... gotta get that punch :)
ReplyDeleteI'm sold! They're on my "must have" list for sure now! Thanks for the incredible inspiration as always!
ReplyDeleteSuch pretty projects!
ReplyDeleteBeautiful! and oh, so cute title!!!
ReplyDeleteThis is sooooooooooo reat ! thanks for sharing !
ReplyDeleteBeautiful projects! Thanks for sharing!
ReplyDeleteGenius! I'm just getting aquainted with my mists (Maya and Tattered Angels). By aquainted I mean, I've sprayed them but not not on a LO! That will change tonight I hope and a misting virgin I will no longer be! You are such an enabler! THANK YOU!
ReplyDeleteMy first mist just came with my June kit! I can't wait to play!!! Thanks for this great tutorial. It's just the inspiration in need.
ReplyDeleteOMG... I'm totally inspired. I picked up a few of these mists at Scrapfest in April, but other than trying them out in my friend's garage (thanks for the box tip :) I have not used them! I will be now!!!
ReplyDeleteThanks for the tutorial--I've just started misting and needed some ideas and tips! Gorgeous LOs, BTW!
ReplyDeleteLove it!! thank you so much for sharing!! I have just got "hooked", too! :D
ReplyDeleteB
i'm so in love with mists, and i wanna collect ALL of them!!
ReplyDeletethanks for the tutorial!
Thank you so much for this tutorial... i am convinced i NEED some maya mists!!
ReplyDeleteFantastic project
ReplyDeleteLove these examples, thanks! I may have to try misting now.
ReplyDeleteThis is absolutely AWESOME!!!! I am going to try layering with sprays... haven't gotten that ditry with them!!!
ReplyDeleteAnd I love the BOX idea to keep it contained, I used cardboard, but it always sprays off the edge, onto the floor! Genius!
Beautiful projects--just love what you did with the masks and mists. I'm on a mission to find that EK Success edger punch--do you know the name of that particular one? Thanks.
ReplyDeleteThis was very cool. Thank you for sharing this technique! Love the look, like a watercolor painting.
ReplyDeleteJust got my first bottle of Maya Mist with my SC June kit. Can't wait to try it! Thanks for the tutorial and I think maybe I can get excited about using cardstock again!
ReplyDeleteThis is an excellent tutorial and LOVE the misting effect. I cannot wait to try it. Thanks so much for this because I have been "scared" of my mists!
ReplyDeleteOMG how beautiful!
ReplyDeleteThe box thing is so genius! I always did it over the sink and always dread cleaning it up afterwards. I guess I am keeping my sc box this month! Thanks Maggie!
ReplyDeleteBeautiful projects
ReplyDeleteThank you so much for this tutorial
Thanks for this!
ReplyDeleteIs the EK Success big scallop punch available yet?
ReplyDeleteWOWZERS!!! I get it now!!!!! Thank u so much for the visual too!!!! I'm off to order some mists!!!!
ReplyDelete