Showing posts with label home decor. Show all posts

April 16, 2010

Member Inspiration!

Today is the day we would normally post a Member Spotlight...but how could I choose just one person when the gallery is hopping with amazing art? Selfishly, I decided to show you what PennyS, howdee and dismommy came up with for the Decor Challenge. I am completely enthralled by their collective re-purposing--complete inspiration!!

howdee came up with this fabulous use for an SC paper bag. View it in the gallery here. If this doesn't inspire you to make use of those bags, I don't know what will!
dismommy really came up with some smart finds to put together this fabulous note board. I love how bright, happy and useful it is. The re-purposed scrabble tiles are the best! See her notes & comment on this project here.PennyS posted this beauty and I found myself wanting to break out the glue gun and make flowers! I love that her board will be inspirational to her family on a daily basis. Clever!! Give her some props in the gallery here.


Kudos to all three of you for taking the challenge & re-purposing 'junk' into useful treasures! If you'd like to participate in the challenge, there's still time. Remember, it doesn't have to take you days--quick and easy can have great results! Happy Friday!

April 13, 2010

Taking Inspiration From Necessity

I think I mentioned a little bit yesterday about re-decorating. My re-decorating is coming from the place of just having the flooring in our entire house replaced. Because of that, we've moved and re-purposed rooms, therefore calling for a little re-decorating. I've been searching for the perfect pillow(s) to brighten up my rooms & dark leather furniture. In my quest for the perfect pillow (and with my scrapping brain in gear) I found just a few that might spark some inspiration for you, too. I think I'll leave you with the images and go scrap!


1. Twinkle pilow , 2. Pillows made with Ava Rose fabric, 3. Joseph's Coat Pillow - it's done!, 4. ♥ pillow, 5. red patchwork pillow, 6. bird:number pillows on bed, 7. kids pillows, 8. Pillow Swap Round 2 - Full View, 9. Framed in 70´s fabrics

April 12, 2010

A Little More Home Decor

Happy Monday! This week Susan and I are going to be talking about scrappy home decor and home decor inspired by scrappy-ness. We've both been doing a bit of space re-decorating lately and thought you would want to share in the fun, right? We hope you think so! I'm going to start this day off with a challenge...and a bit of (yipes!) SC blasphemy. ;)

CHALLENGE: Make a piece of home decor, big or little, inspired by scrapbooking, made with scrapbooking supplies or both.

That's right, you got me...not a big lover of the vintage (ducking the tomatoes now). What I do love is re-purposing and re-using. Yesterday I was moving two boxes of Eric's old family photos into a new space and came across an empty frame. You know, one of those really thin gold colored ones that every old photo seems to be housed in? What really struck me about it was the corrugated cardboard backer. I was immediately inspired by April's flower frames from CHA and my newest love, the ribbon roses from the Dear Lizzy line.

I've had a picture of my parents & myself as a newborn in a picture clip for a while...wanting to frame it, but not sure of the best option. It very much seemed like kismet to find the old frame yesterday. I gathered a few little bits & bobs that were lying around from past kits and made a copy of the photo--like the original, I rounded the corners and roughed it up a bit.

My goals were: 1. not frame the photo in the traditional sense 2. use the awesome cardboard backing and 3. draw attention to the photo, not necessarily the old gold frame.

Quick. Painless. Scrap inspired and scraps used. A side benefit being I was also able to re-purpose something I didn't actually love into something that I do. I can't wait to see what you do--post to my thread on the message board and I'm pretty sure Susan will draw a name for a $5 Studio Calico gift card on Saturday. We'll be back the rest of the week with some member inspiration, a tutorial & lots of eye candy!

February 27, 2010

Yo-Yo Flowers Tutorial

Quite a few of the Design Team made the project kit add on this month. I know when midnight rolls around we are going to see a few different takes on the fabric flower.

I love making fabric flowers, and one of my favorite quick and easy ones is the yo-yo flower! For one thing, its called a yo-yo flower, that totally makes me smile and think of Eazy-E. When you make it without a hem, it is a quick and easy embellishment to any project.

Here's my process:


1) Find a circle for a template. This is a random chipboard circle that I had lying around, but I've used all sorts of things in the past including a punch like this. The finished flower will be 1/2 the radius of the beginning circle.

2) Either trace the circle or just cut out around the circle template. I chose to trace the circle.


3) Cut out your circle! I love my cutterbee scissors, but I've also used these Tim Holtz scissors with excellent results.

4) String a needle with embroidery floss or bakers twine with a knot in the end. Sew a running stitch around the outside edge of your circle, leaving approximately 1/8th inch of fabric. Gathering fabric as you go.

You don't need to make a hem like you would on a quilt yo-yo, because we will be covering up the middle of our yo-yo.

5) In the end you will have a little drawstring bag.

6) Turn your bag into a flower with the gathered part in the center. Leave the floss and needle in place if you are sewing on a button. If not, tie off your floss.

7) Sew a button into the middle of your yo-yo, and voila, a yo-yo flower!!!


Here is my completed banner project for our new baby's room. There is a yo-yo flower between each flag. I used the Patchwork add-on along with papers from the other kits for the mini banner and letters. I used lime twine for the mini banner. I also added a spray of Lemon Mist on each of the flags.

Here are a couple of other uses for yo-yo flowers.

January 29, 2010

Home Decor Blog Challenge Winner

Emily here, apologizing that I didn't get a winner picked until now for the Home Decor blog challenge posted two Mondays ago (1/18). I had spotty internet while away at CHA, so I never got around to seeing all the great projects entered into the challenge.

But WOW! Your entries sure impressed me, some beautiful works created, a lot with scraps or products that were collecting dust. I'm glad to see how much was accomplished. Thank you.

And without any further ado, Mindy aka wlsdrew is the winner with this cute framed project. Mindy please email and we'll get you set up with your $5 certificate!

January 19, 2010

Tuesday Inspiration

Since Tina and I are focusing on the Home Front this week, I thought I'd share some of my new favorite blogs with you. My sister got my plugged into home blogs. There are so many different ones to choose from, but through one blog she directed me to, I found a treasure trove of links. So I'll share a couple I've found, but you can explore The Homies 2009for hundreds more options! I like looking at these blogs because they are not scrap related at all, but you can pull inspiration from them just the same.

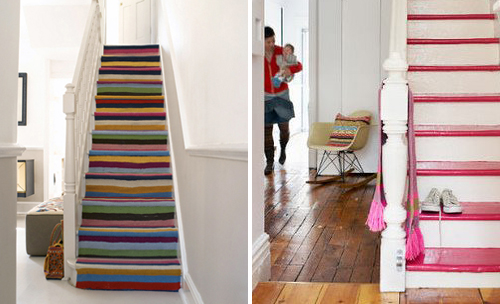
Door Sixteen--this is the first one that Julia pointed me toward. It's a fun account of remodeling an old house and buying a 400 square foot apartment and doing the same. Some beautiful inspiration photos, and a fun read. She loves white floors and black walls. And I love her stairs.


Simple Blueprint--a collection of images that the author has found on the web. Some really fun things, not all house related, but still very inspiring. But this one is definitely house related, and I found it very cool on the following levels: the grunged up wall on the left, the photo frames on an entire wall, the wood plank floors, and the stacks of books on the left. Lots you could do scrappy wise.


Rare & Beautiful Treasures is an online journal of sorts, she's got it split up into different categories, I got this photo from her decorating inspiration file.

There's just a few of the ones that I've been discovering. I can spend far too much time going from link to link, but I find so much inspiration. I hope you will too!

January 18, 2010

Monday Challenge on the HOME FRONT

It's Monday! Tina and I will be hosting the blog this week and decided that since Home Front was NOW ON SALE in the Shop, we'd devote our week to home-related things.

So for Monday's challenge, I'd like you to make a home decor piece. As scrapbookers, we have the perfect stash for making things to decorate our homes, so this week, pull out those supplies and get creating. I have a thing for picture frames. I like to buy them and then never put pictures in them. I have pictures of someone else's children sitting around my house. I decided that needed to change. I made a conscious effort to make home decor projects every few months so I could start using those cute frames. This was the first project I made, some magnets for my sister. I used Garment District on these:

My second project was a numbers canvas, I used the entire package of Sassafras chipboard numbers. I put a thin layer of Claudine Hellmuth's gesso over the canvas board, then fit the numbers down into the gesso. When the gesso dries, it's solid, so the numbers weren't going anywhere. I stacked some of the numbers on top of others, using the CH gel medium (I used the matte, but you could also use the glossy) as the adhesive, I didn't think the adhesive that the chipboard came with would stand the test of time too well. Gel medium will. It's a serious adhesive. When the project was dry the next morning, I painted a thin layer of the medium over the entire project, as a sealant.

A few months later, I made this canvas, using the Claudine Hellmuth sticky back canvas, gel medium, orange paint, the happy home stamp, and a button. To see a tutorial on how it was made, go here.

This is the first one I actually used a frame I'd already purchased. I just covered the Maya Road mini chipboard houses with papers, sanded the edges with my precision files from Basic Grey, then attached them to the cardstock and stamped. I'd love to say it was quick and easy, but it did take a while to do all the sanding. But it was worth it.

And finally, I just made this project. This one was fast! I just cut out a bunch of leaves, a tree trunk and glued the leaves to the branches. It literally took me 30 minutes. And I love how it turned out.

So there you have a variety of home decor ideas. If you want some more inspiration, go to Karen's (akaliz) gallery, she is who I think of when I think of home decor using scrapbook supplies.

You have until midnight Pacific time Saturday. Link to the thread on the message board. Please, make your entry a NEW project, not one you've already created. Have fun!

December 23, 2009

Ode to my Mom :)

Hello everyone!

I know everyone is getting ready for Christmas but I thought you wouldn't mind seeing the cute gift I made my mom using the amazing Printers Tray project kit :)

I know it's quite difficult sometimes to find Christmas gifts for our loved ones, especially if they keep telling you they don't need anything! Well, there's one thing they always need : LOVE!

So, I thought I would work on a project to make my mom happy and I know she's going to like it :)

Ok so this is what you might need to make this project :

First of all, you need to cut twelve 2,5x3,5" pieces of paper into your favorite patterned papers (one piece for each little window).


My photos are a little bit smaller than the ATC's size as I've been having problems with my printer but, in a way, I like it better like this as I managed to mount them on patterned papers and it looks good too.
You'll see that, on another ATC, I used this clear acrylic butterfly as a mask with my Charcoal mist. You just need to use a baby wipe to clean your butterfly afterwards.


Here's a very clean design, not to get a too overwhelm and busy design on all of my ATC's.


For this one, I just cut stripes of papers, glue it on my ATC and sprayed some mist on top of it all. Then you can use a heat gun to make it dry faster, if you don't like to wait (just like me). Cutting the chipboard button can add interest to your design, as you're working in frames.


Those tiny flowers are just too cute for words!


You can use tiny embellishments on your alphas as well.


This is what I was explaining earlier with the butterfly clear acrylic. Doesn't it look cool? Simply outline it with a white pen, write a bit of journaling inside the shape and ta-da!

Here, I cut a flash card in two and work on two ATC's frame at a time, in order to match the design a little bit.

And this is what it looks like in my artroom vintage wall! :) Too bad I'm giving it to my mom because I think it looks great on my black&white vintage wallpaper :D but that'd be the reason to get me another Printer's tray :)

I hope you liked it, girls, that you got as much inspiration as you can :)

Merci! :)

Céline

November 17, 2009

Grateful for Inspiration

One of my favorite thing about the holidays is looking through magazines and websites and dreaming of what I would do to decorate if I had money and gumption to do so. I just love seeing how different people (and truthfully the magazines) decorate for Thanksgiving and Christmas. The reality of OUR crazy family dinners is "faux" plastic china (from Costco) red drinking cups and lots and lots of food and laughter, but a girl can dream, eh?


Love this simple buffet with a combo of pewter and wood and whiteware. The berry twigs just scream fall, and they can be found in (someone's) yard for free :)

This is another "cheap" idea of turning veggies into candle holders wrapped in ribbon or just hollowed out. Those artichokes are seriously adorable!

Another totally "do-able" paper craft, cut letters out of cardstock or fall colored patterned paper with a Cricut or craft knife, and slip them over candles as covers! I love this idea!

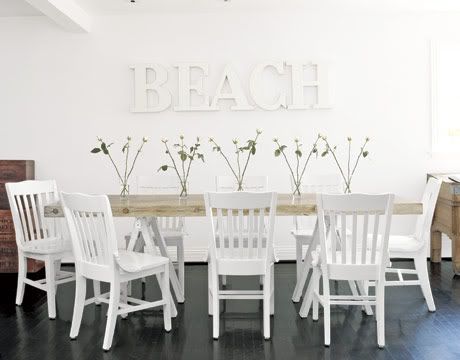
Not really something I'd ever do, but I really like this idea of an all white table. Very modern and wonderful!

I'm always a sucker for multiple things inside of glass pieces. Random, I know. I LOVE LOVE LOVE that big glass hurricane with candles, twigs, acorns and PHOTOS, are you kidding me? PHOTOS! (you must see this bigger, click through, click through!)


That Martha, she (well, her staff) is always a fount of cool decorating ideas. Most of them are do-able by the common (wo)man! I love these corn husk covered votives!!

Glue some acorns onto ribbon, cut leaf shapes for place cards (or press some real leaves) and you're in business!!

Another pressed leaf project. Clear plates sitting on top of a small branch of leaves. Loverly!!!

OMGosh, seriously? The cutest thing EVAH!!! Check out Martha's whole Thanksgiving decor slide show by clicking on that cutie!!


:) This turkey is more my speed. This project totally makes me smile. I have a bunch of nieces and nephews, (and my own 3) and this is a project that we could make at the cabin before we do the big Thanksgiving on paper plates thang ;)

Most of these photos are clickable to other ideas....if you need more inspiration click around through some of the lovely tables I found, and be inspired!!!