I have made them before, but still had to find directions to remind myself how to make them. They are so darn easy. Maybe this time the directions will stick. I *do* have brain sapping young children though. Perhaps I will have to bookmark my own post, lol.
To start your pinwheel, you need one piece of patterned paper. Double sided is preferred, because you will see both sides.
For this pinwheel, I trimmed my paper to 3 inches by 3 inches.
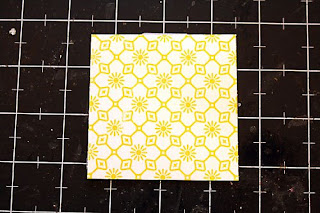 After I was finished, I put a little dot in the center of the square. With this one I just eyeballed it because the pattern in the paper made it easy to guess.
After you make your mark, take a ruler and place it on the diagonal.
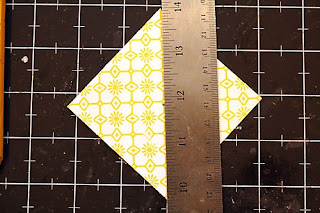 Using a blade, trim down the line, stopping at about 1/4 inch from the dot in the center. You don't want to cut your square in half. Don't have a blade? For the pinwheels I made for my layout, I put my square in my paper trimmer.
When you are finished with one side, trim the other diagonal, until your square looks like this:
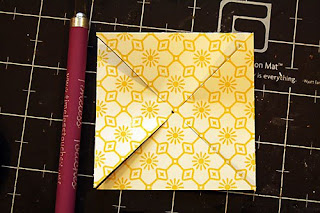 Next is the fun part.
Now if I could have found a way to show you how to do this without including my hands, I may have done it, for I inherited my mother's man hands. They ain't pretty. I did manage to hide a burn mark near my thumb, though. Yesterday I was grocery shopping while hungry (NEVER do that!) and as I was headed for the clerk I walked right by the rotisserie chicken. Well, the wafting smells of delicious chicken could not be ignored, so I reached in for a bird to take home for dinner. However.... the stinkin' heat lamp they were under totally reached out and grabbed me as I tried to remove chicken licken from the table! I swear it did. But I took her anyway.... and she was GOOD.
Anyway.... my hands. Don't look.
You are going to take one corner of your trimmings on each side of the square and fold it towards the center. I folded the one on the left, but I'm a lefty. You can choose either side, it doesn't matter. Just put a little dot of glue or a glue dot under the tip and press it down over the dot you penciled on the center of your square.
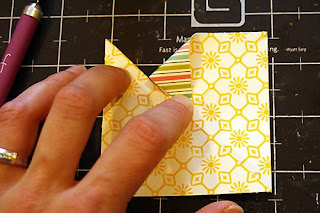
For this next image, gosh darn it if my pointer finger on my man hands looks retarded. And the photo is blurry. Good grief. But I wanted to show you the next step. You can choose to pull down the left corner, or the right corner of your triangle. But whatever side you choose, you need to do that on each corner of your triangle, adhering it in the center. This image shows you the second triangle pulled down, from the left.
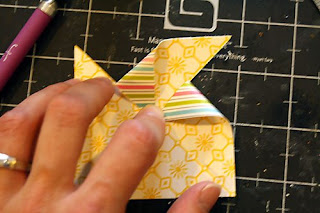
Repeat on all four sides until all four corners are in the middle. To make it clean, I also punched a little flower out of paper and added a Basic Grey half pearl. But you don't have to do that.
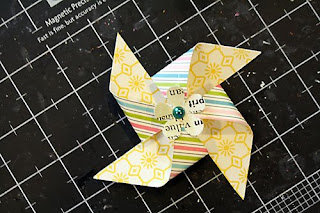
Voila! A perfectly easy and perfectly made pinwheel to decorate your summer projects.
Check out what some of the DT members did with their pinwheel creations this month:

 And here's mine! If you look closely, I made my pinwheels going both ways, depending on how I folded down the corners. I also made two sizes. The big ones were made with 3 inch squares, and the smaller one was a 2 inch square.
Are you inspired now? I'm sure you are itching to make a pinwheel now, aren't you? How about if I issue you a challenge? Okay.
Here's the challenge:
Put a pinwheel on a project. Create your own pinwheel, add it to your next project, and link it to me on this thread. You have until Saturday the 6th at midnight PST (because I am PST, woot!).
On Sunday morning I will draw a name, and the winner will get one of these:

That's the Effervescence punch. I know you have been wanting to try it out! Now get to work! A card, a layout, a wall hanging, it doesn't matter. It just needs to have a handmade pinwheel on it.
Have a great weekend! I'm headed to Portland to take my kiddos to the zoo!
Davinie


