May 9, 2010

Sunday Sketch

The sketch this week is based on this layout by Maggie Holmes.

Maggie used 3 photos on this layout (3x5 and 2 - 2x3"). Notice how she grouped the photos together, then added several strips of patterned paper and embellishments around the grouping. Also added were some clouds at the top right corner, but you could add a title or another type of embellishment.

The journaling is housed along the left side of the page in a column format. I love the linear look it gives the page, plus it allows for a longer story to be told.

Now it's your turn!

Take this sketch and interpret it any way you like, then link your layout in a comment on this thread for a chance to win one of two $5 gift cards. Deadline is Saturday night!

Sunday Sketch Winners

by leah


by Hera

Congrats to both winners! Please send an email to info@studiocalico.com to claim your prize and include the following information:
  • Name
  • Contest: Sunday Sketch
  • Prize Won: $5 gift card

Layout of the Week


The layout of the week is brought to you by Julie Fei-Fan Balzer (milkcan).
Each week, the layout in the gallery is linked, so you can add it to your favorites easily.


This layout has been added to your favorites more than any other layout in the SC community gallery for the week of 5/2-5/8.

Congratulations Julie! Because of this you have won a $10 gift card to be used on any new purchase at Studio Calico.

Want a chance to win next week? Be sure to upload your projects to the SC gallery, and support your community by adding special projects that catch your eye into your favorites! It could be YOU next week!

Please note, winners are not allowed to win more than once in a four-week period.
Winners are not limited to those using Studio Calico kits.

May 8, 2010

Tutorial: Hand-stitiching Words Onto Paper

Hi Everyone! Susan here today with a tutorial on hand-stitching. I love the look of hand-sewing & embroidery on both my cards and layouts, and wanted to show you an easy way to hand-stitch words onto your own paper projects.

Start by printing out the word you'd like to include on your project, in the font and font size that will work best. (I used 'amelie' font at 150 pts).


Gently tape the corners of the paper down over the cardstock that you'd like to stitch onto.


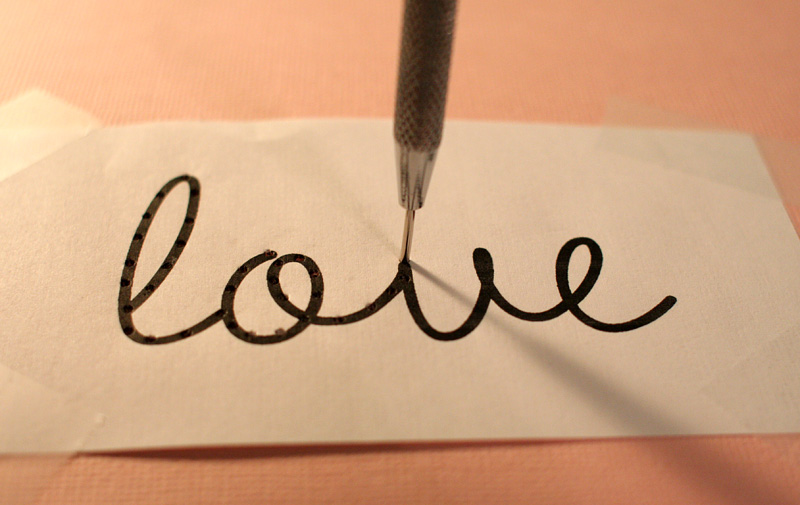
Use a paper piercer to pierce holes along the printed word, at even intervals (keep in mind tht your interval hole length will dictate your stitch length). I like to use a craft mat under my cardstock while I'm piercing holes.


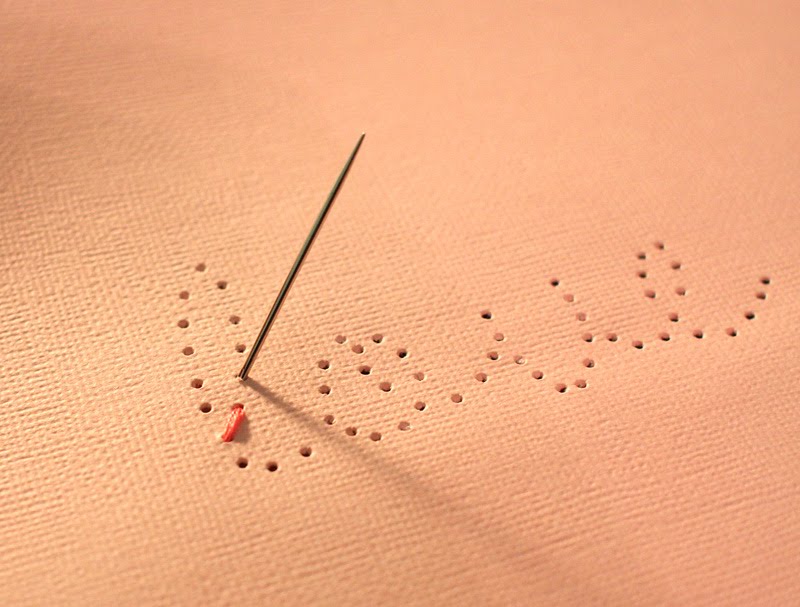
Once entire word is "pierced" gently pull up template paper to reveal stitching pattern on cardstock.


Using a large embroidery needle, and embroidery floss, start to stitch word using a backstitch stitching technique. Secure end of floss to backside of cardstock using a small piece of tape. Then make first stitch, and bring needle back up through second side of second stitch.


"Backstitch" by threading needle and floss BACK THROUGH previous hole as shown.


Continue on along word, and stitching holes.


Until entire word is stitched! Secure end of floss to backside of other end of word using a small piece of tape.


Trim your stitched word from your cardstock anyway that you like and include it on a card or layout!

:)

May 7, 2010

member spotlight : qingmei

Happy Friday, all!! I'm super excited to sspotlight one of our members today - the lovely and talented Geralyn! She goes by qingmei on the message board and I'm sure you've noticed her beautiful pages in our gallery. Geralyn's work shows a wonderful sense of color and design, and I can't wait to share a little more about her with you all.


1. What 3 items can you not live without?
Studio Calico alpha stamps (particularly the Carter & Storytime alphas).
Label stickers.
Border punches.


2. What's inspiring you right now?
These days, I find a lot of inspiration from browsing through tumblr or design blogs (one of my favorites is http://ohjoy.blogs.com/). I also get inspiration from JCrew and Anthropologie catalogues. If I ever feel like I'm stuck, the amazing DT gallery at SC never fails at inspiring me; I love browsing through the past galleries as well.


3. What's your favorite Studio Calico kit?
Joyland - I love the color palette and the mix of papers, alphas and embellishments is perfect. I find that my layouts with Joyland are coming together pretty quickly because I love the combination of supplies so much.


4. What are you listening to right now?
Hmmm...The Fray, Jack's Mannequin, Joshua Radin, Matt Nathanson, Explosions in the Sky, and Voxtrot. Oh, and songs from Glee!

5. Any guilty pleasures?
CW's The Vampire Diaries. I thought it was a silly show, but my sister got me into it at the beginning of this year and now I find myself anticipating the newest episode each week :)

6. Choose a layout that best represents you as a scrapbooker.
Hmm, I don't really know how to define my 'style', but perhaps this layout:


I picked this layout because it shows that I scrapbook 8.5x11 pages (I'm more comfortable with the smaller size than 12x12). I feel that my layout designs are pretty neat/clean, but I love adding details and embellishments. Oh, and I always handwrite my journaling! :)

Here are a couple more examples of Geralyn's work:


How fun are those fisheye pics?? i love the added patterned paper borders on two of her photos, and titlework here is perfect.


More beautiful titlework on this page - and I absolutely love the misted background and all of the little bits sprinkled around the page.

I hope you enjoyed this inspiration - please stop by Geralyn's gallery for even more gorgeous projects! If you have any questions for her, please ask away - I'm sure she'd be happy to answer.

May 6, 2010

insider tips : from inspiration to finished page

On Tuesday, I shared a few inspiration pieces with you. Today, I thought I'd show you how I used those ideas on a page.


I started with this piece as my main inspiration. I loved the way the hexagons were scattered on the background, and wanted to use a similar design on my page. I cut one hexagon from the Studio Calico exlcusive paper in Granny's Cupboard, and then used it as a pattern to cut more from other patterned papers from Anthology and Granny's Cupboard.


I played around with the placement of the hexagons and drew in where I wanted to add stitching, stamped journaling lines and some border punched paper. I use this trick a lot - once you stitch and stamp, there's no going back! This gives me a better way to visualize how it will look once I've added those elements. Once I'm happy with the basic design, I usually snap a quick photo. Because if I'm going to add stitching to the background I've got to go back to the beginning.


Yep. Everything came off the kraft cardstock. I added the strips of red at the top and bottom and stitched around my border, then added the graph patterned fabrip and the blue punched paper and did some zigzag stitching. I also stamped the journaling lines in pumice stone down in the bottom corner.


Then I need that photo that I snapped so I remember how to put it all back together! I added a few more hexagons and another fabrip to the page, and the stitched them all in place. The American Crafts glitter brads from Linens and Lace were the perfect accent to my small punched circles. At this point, if at all possible, I walk away from the page for a while. It's almost done, but I know it needs some finishing touches.


The next morning, I added the tab at the top of the photo (it's a sticker from the Anthology Labels - I punched a few hearts in it and backed it with the grey Aperture paper), the layered accent at the bottom right of the photo (that space just felt empty to me - I layered a piece of October Afternoon Thrift Shop paper punched with my Fiskars L Seal of Approval punch with a stickers from October Afternoon and Anthology, and then topped it with chipboard hearts). I also added a couple more small chipboard hearts tucked in with the other elements on the page. I added my journaling and did some stapling with my tiny attacher to finish the page.


I used some of the other ideas from the original inspiration post - the circles within the hexagons and planning my cuts around an element in the patterned paper. These ideas helped make my groupings more interesting than if it had all just been patterned paper.

So that's a little peek into my creative process - let me know if you have any questions! =)

May 5, 2010

Card Challenge Winner!

twirlyrsc


Congrats!
Please email me April at april@studiocalico.com to confirm and also note "Tina's card challenge"

Thanks to all who participated!

NSD Challenge favorites!

Since this week's challenge is a "leftovers" NSD-themed challenge (see here!), I thought I'd take the chance today to revisit some of my favorite member gallery projects that were entered into Saturday's round of challenge contests...

Here they are!!!

I can't get past how FABULOUS these layered flowers are - that abbsparks created for this layout - for Kimmi's NSD layered flower challenge...


And I absolutely LOVE how allieH made just FIVE PRODUCTS so "minimally-chic" on this adorable layout for Kelly's 5 product challenge...


And how about this amazing layout by milkcan for Sasha's white space challenge... The series of color coordinated circle cutouts/punches is so fabulously fresh!!!


Finally, how sweet is this layout about her mom, by qingmei... for Joy's "Scrap your momma" challenge! And I adore the ultra hip grey/yellow/aqua color scheme!


Can't wait to see everyone's second-chance takes on the array of NSD challenges for this week's "Leftovers" challenge!!!

:)

-Susan

May 4, 2010

inspired by : hexagons

In honor of the fabulous honeycomb SC exclusive paper in the Granny's Cupboard kit, I went in search of more hexagon inspiration on Flickr.


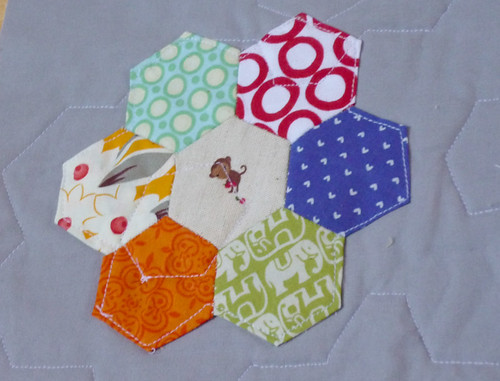
How fun is this? I love that each little hexagon showcases just the right part of the pattern.

(source)

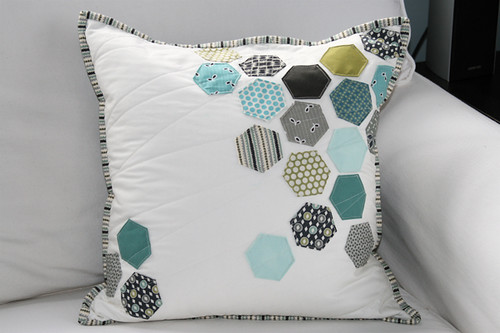
I'm totally digging the hexagon border on this pillow.

(source)

I love how the hexagons are scattered on this, rather than nested together.

(source)

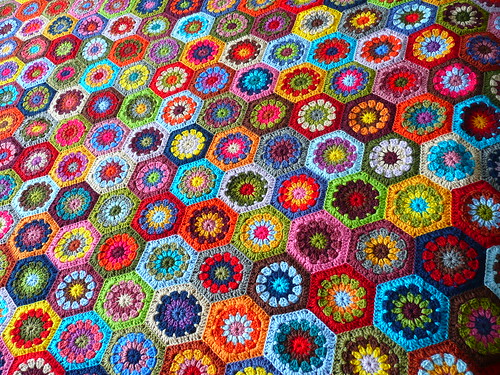
All this color makes me swoon! And it would be fun to apply the idea of doing circles within a hexagon to paper.

(source)

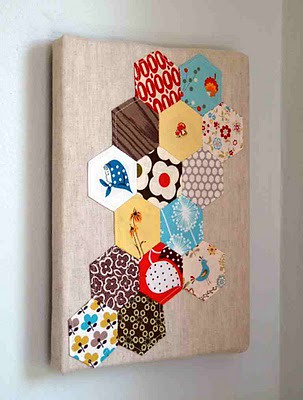
Hexagons as wall art.

(source)

I adore the idea of making flowers out of hexagons.

(source)

And this last one is a little more freeform, but has an overall hexagonal look. This would be super fun to do with paper.

(source)

I think I'm going to have to make a page using one or two of these ideas - how about you?

May 3, 2010

Bring a Friend Winners!

Drumroll please.........................................

This is our biggest giveaway yet: 2 sets of friends EACH win a 6-month subscription to Studio Calico.

  1. Jenrey & c@rl@
  2. Piradee & Norcha
Congrats ladies!!!!

Please send an email to info@studiocalico to claim your prize and include the following information:
  • Name
  • Username
  • Address
  • Contest: Bring a Friend on NSD
  • Prize: 6 month subscription beginning with the June kit