September 29, 2010

Fashion Inspired Layout

Happy almost Thursday! :) Kelly N here with my fashion inspired layout. When I saw Kelly P's post yesterday, I was instantly inspired by the ruffle neckline on this shirt. I knew right away I wanted to try something similar on my layout.
Being the Mama to 2 boys, I knew the purple wouldn't work ;), but I thought I could pull off the "ruffle" look without it being too girly. I used my circle punch to punch a bunch of circles from various Elementary papers. Then, I simply layered the punches along the edge of the Window Seat paper from Documentary. Super simple to do and it's a really fun look. To make my fashion inspired page less girly, I added some masculine elements like buttons and an arrow. I added in the Sass banner and border stickers from the En Plein Air add-on along with bits of the Sass paper to finish the layout. Also, using more traditionally masculine colors lends a boy-ish feel to my page.

Don't forget to link your fashion inspired layouts to this thread on the message board! We can't wait to see what you come up with! :)

September 28, 2010

Fashion Inspiration

Hi everyone, it's Kelly Purkey here! When Kelly Noel + I were brainstorming up themes for our blog week, I knew we'd be perfect for a fashion inspiration week since we're both girls that love to shop. I wanted to share some fashion inspiration today from a couple of my favorite sources.

I love the GAP website because their lines often have bright colors and fun combinations. I found this cute little boy's sweater... I never would have thought to put grey in with orange + brown but it looks fabulous.I also really liked the homepage for GAP. I could see a cool design for a page using this as inspiration. Maybe frames made from the polaroid stamp in the On the Easel kit!

I also found this cute top on the Banana Republic site (don't you love how easily they're all linked at the top of the GAP/ON/Banana websites?!!) and thought it would be a fun idea for layered punched circles.One of my favorite places to shop is J.Crew and they always inspire me with the color combinations they come up with. I loved this green, tan, dark grey, and light blue combo... it would be perfect for some winter photos.
I found this page in a recent J.Crew catalog and the colors that they listed for the coat caught my eye.
I whipped up a quick page using a dark green, dark blue, taupe, dark orange, and plum inspired by the colors listed...
Hope this gives you some ideas for finding and using fashion inspiration. Can't wait to see what you all come up with for the challenge!

Challenge: Fashion Inspired

Good morning! I meant to post this challenge yesterday, but got caught up in all the reveal excitement last night and forgot. My apologies! :) KP and I are hosting the blog this week. Since fall is here and all the fall fashions are popping up in the stores, our challenge to you this week is to create a layout/project inspired by fall fashion. Think fall colors, ruffles, stitching, etc. I'll play along too and post my layout later this week.

We'll choose a winner on Sunday night, so be sure to link your layouts to this thread for your chance to win a $5 SC gift code to the shop. We can't wait to see what you make!

September 26, 2010

Tutorial: Misted Flower Headband


Hello SC friends! Kelly N here to show you a quick little headband I made this weekend. It's super fast and easy and now I'm so hooked on making them, I might have to go buy some more headbands.

I used some of this new white flowery American Crafts ribbon (Maya Road makes a similar ribbon that would also work well). To start, I cut 3 flowers from the ribbon, trimming away the excess.
This is what the flowers will look like once you've cut them from the ribbon...
Next, I used mist to color the flowers. Super quick and the mist dries so fast, which I love, because I'm an instant gratification kind of girl! I used turquoise, purple and the Dark Calico Mister Huey for mine, but with so many different color mists in the shop, you could come up with all sorts of fun color combos.
Here's what they look like all misted....
Now, take a piece of cardstock punched into a circle (felt would work better for this, but I didn't have any...you should use felt!). Put some glue onto your circle...
Stick all the flowers down onto the circle, add a fun button/brad in the center to finish it off and then simply glue it onto a plain headband and voila, you've got yourself a snazzy headband!


I hope you enjoyed this quick tutorial...be sure to show us if you make one of your own. Enjoy the reveal tomorrow night and have a great week everyone! :)

September 25, 2010

Layout of the Week


The layout of the week is brought to you by Geralyn Sy (Qingmei), using the Back 40 kit. Geralyn also added the Addy Alphabet stamps available in the shop on 9/27.
Each week, the layout in the gallery is linked, so you can add it to your favorites easily.


This layout has been added to your favorites more than any other layout in the SC community gallery for the week of 9/19-9/25.

Congratulations Geralyn! Because of this you have won a $10 gift card to be used on any new purchase at Studio Calico.

Want a chance to win next week? Be sure to upload your projects to the SC gallery, and support your community by adding special projects that catch your eye into your favorites! It could be YOU next week!


Sunday Sketch


Here's a challenging sketch this week inspired by Susan Weinroth's "Remembered" layout. This sketch is perfect for documenting LOTS of photos, but feel free to include memorabilia, embellishments, patterned paper, or whatever your heart desires in all the nooks and crannies of this layout.

Oh, and if you'd like to modify it to be a one page layout, that's fine too. Whatever you do, have fun and play!

Now it's your turn! Make this sketch your own and link your layout to this post no later than Saturday for a chance to win one of two Studio Calico gift cards!

Sunday Sketch Winners

by simplytam using the Joyland kit

by Houston

Congrats to both winners! Please send an email to info@studiocalico.com to claim your prize and include the following information:
  • Name:
  • Contest: Sunday Sketch 9/19
  • Prize Won: $5 gift card

Reveal Night Giveaway


Want to win a fabulous Lost & Found prize pack?

Let us know if you ever lost anything of value and if you found it. This might even be a fun prompt to scrapbook about.

September 24, 2010

Member Spotlight: Amy Tan

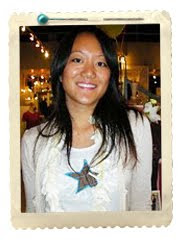
I am so excited to spotlight this cute girl today because not only is she super duper creative and inspiring but she is also super sweet. I met her earlier this year at Reflections and she is one of those people that instantly treats you like an old friend! Love her!

I asked her a bunch of questions and picked out some of my fave layouts from her gallery...... here we go.... all eyes on the cute and creative.... and sweet Amy Tan (also known as Amy Tangerine since many people think that is her name!)

Q: When did you start scrapbooking and what got you started?

A: I started in 2007 after visiting a local scrapbooking store and signing up for Emily Falconbridge's class that was happening the next day. After taking her class, I was totally smitten with the hobby, the producs, and all the wonderful people involved.

Q: What are your top 5 favorite products and why?

A: 1 - Patterned Paper - reminds me of fabric, and usually sets the tone of the layout
2 - Stickers - who doesn't love stickers?
3 - Rub ons - so versatile and fun to use
4 - Cardstock - especially white and kraft, just a good base for a page
5 - Punches - this is a fairly new obsession. Love making fun embellishments and putting a new twist on the papers


Q: What is your favorite Studio Calico product and why?

A: Love the patterned papers and the Fabrips. Both are fun to cut up and transform. I like the sticker sheets too. Heck, I really like it all!

Q: What is your favorite go-to or signature technique?

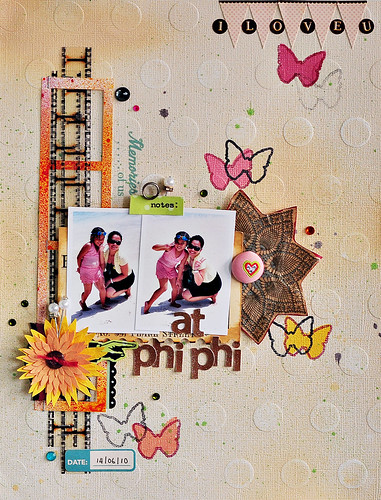
A: Sewing on paper - both hand sewing and machine sewing

Q: Where do you find your inspiration?

A: I'm inspired by the world around me, quotes, experiences, new products and life in general


Q: What is your favorite color and/or color combo?

A: I love all colors really.... but I suppose my recent faves have been yellow, orange and turquoise.


Q: Tell us a bit about your design process.

A: Usually I start with a photo and then choose the patterned papers and cardstock. Then I glue everything down and add the embellishments and the title. I rarely ever take a layout apart. I trust my instincts and go with it. Mistakes have been made, but it usually turns out to be something new and cool.


Q: Tell us a bit about what else you do since we know you are creative in more ways than just scrapbooking.

A: I have a full plate, balancing both creative and business. I am a consultant for Rodan & Fields. If you want amazing skin or a great way to make some extra income, let me know! I also run my company, Amy Tangerine, which used to be primarily a tee shirt line sold in over 250 stores around the world. Now it's multi-faceted and we provide custom tees, creative consulting, on-site scrapbooking for events, and custom scrapbooks for clients. Please come say hello: amytangerine.blogspot.com

....................................................

Well, as you can see from her layouts and pictures, she is not only adorable but uber talented! Be sure to check out her blog and her gallery on Studio Calico if you want some serious inspiration!! Thanks for letting me spotlight you Amy! Can't wait to see you again next time I am in Cali!

September 23, 2010

Insider Tips: Pink for Halloween?!?

I am getting super excited for Halloween! It isn't necessarily my favorite holiday for the holiday in itself but I do absolutely love the Halloween decor! Next to Christmas it is my favorite holiday to decorate for and I always wish that I could just leave everything up all the way until I am ready to switch it out for Christmas. My house always feels kind of bare when I take down the spooky things and leave just the "fall" things. Is anyone with me on this or is it just me? :)

But then I also have another sort of dilemma which is that my home isn't decorated with "fallish" or Halloween colors. I have lots of turquoise and pink around my home -- in the pillows, frames and even the pictures and so the question becomes how do I work it all in without having to literally take down and switch out all of the permanent/normal decorations in my home? Of course there are some things I take down and put away just to make room for the holiday decor but then there are other things (like the frames and art) that I must leave in their normal places. Well, I'm here to tell you that it can work! There is no hard and fast rule that says pink can't be included in a Halloween color scheme! When it comes to color, you know I love it and I am not afraid to push the boundaries or break the "rules."

Let's use this layout as an example. The Harvest Moon Add-On Kit jumped out at me as one I knew I would use and get a lot out of (since I do love Halloween and I always have lots of photos of the kids in their costumes!) Then I got it out and also got out my photos of Emily Jane in her adorable little butterfly costume, which was (yep you guessed it) PINK! Lo and behold there was no pink to be found in the Harvest Moon Kit and so I was faced with the same dilemma.... how do I use the fun and spooky and fallish papers and embellishments without making the photos stick out like a sore thumb??!?

Here's what I did..... I grabbed a sheet of pink cardstock even though it wasn't part of the actual kit (shhhhhh, don't tell! remember that part about breaking the rules? only no one needs to know... it's our little secret! ;) ) Then I got out some of my trusty orange maya mist and got spraying. I wanted the pink background to tie in with her costume but I also wanted to add some orange right on the background. That's because I knew that if the background had both orange and pink it would feel like it was made to match the photos and the layout. Not only does it tie in the costume color but it also ties right in with the orange from the halloween accents.


Next you may also notice that I didn't use a huge amount of Halloween accents that were overwhelmingly orange and black. Again I wanted it to feel like Halloween but didn't want the pink to stick out or feel out of place so I went for things that had a lot of colors in them - adding in some blues, greens and yellows as well. Now we have lots of different colors going and all of those colors look great with pink..... which ends up leaving us feeling like the pink blends right in. Whereas if I had only used papers and accents that were strictly orange and black, the pink might have seemed a little off and out of place still.


So in the end it seems opposite of what you might think to try but it worked..... by introducing even more "non-halloween" colors and accents into the mix, it tied the pink in even more and made it all come together perfectly! Who knew that pink could do Halloween so beautifully? :)

September 22, 2010

Sunday Sketch - Sasha's version :)

I played with the Sunday Sketch this week! This layout, my friends, may look nothing like the sketch in the end, but I promise you I started with it! :)

DSC_0043 copy

I punched the classic butterfly out of a scrap cardstock. Then, using that as a mask (and covering the rest of the layout) I misted them with *from the bottom* - Orange Sherbet, Sunflower, Bubblegum and Pink Lemonade. Then, I lifted the mask, and using the 'outline' classic butterfly stamp, I stamp roughly where the masked images are with Fired Brick. And again with Black Soot.

And the rub on was applied on a Studio Calico brown bag. Makes me happy, that brown bag. *grins* I hope you'll play along, if you haven't already!


September 21, 2010

Outside Inspiration + Bonus Challenge

Hey everyone!
Yes, you read that right! I have a bonus challenge for you this week! It's gonna be fun, I promise :)

You'll get two images - as below. All you have to do is be inspired by them. A layout, a card, an altered item - whatever makes your heart happy.


(via persimmonandpink on Etsy)

Here's my take :)


This layout makes me smile, wholeheartedly. That photo, wasn't even perfect. They were busy spinning at the playground, didn't wanna stop, didn't wanna pose for mommy. *sigh* My babies.

I used kraft cardstock + white flower to mimic the tan purse. Then I stamped my title in many colors just like the graphic print. I added some 'me'~ness with the subtle misting, jute, punched butterfly, tiny attacher, tim holtz memo pins and Studio Calico Rub Ons - the alphabet border.

Now it's your turn to be inspired.

Please link back your entries to this thread. Winner will be chosen randomly from all eligible entries. I'll draw a winner for a $5 GV to our favorite shop next Monday morning.

Yes, you have one extra day to work on this one. :) Have fun!!

September 20, 2010

Monday Challenge : Scrap Recipe 2

Good morning to you,
Good Morning to you,
Good Morning my dear friends,
Good Morning to you!

I'm back with another Scrap Recipe challenge for you since many of you love the last one :)
Here's your recipe for this week :

DSC_0042 copy

Here's mine. I used
DSC_0066 copy

Now go have fun! Remember you can add your own 'ingredients' to the layout. Just make sure you have all five items in plain sight on your layout. I used the some fun punches and rub ons on mine.

Please link back your layout to this thread. Winner will be chosen randomly from all eligible entries. I'll draw a winner for a $5 GV to the shop next Sunday morning!

September 18, 2010

Layout of the Week


The layout of the week is brought to you by Mandy Starner (MandyKay), using the Back 40 kit.
Each week, the layout in the gallery is linked, so you can add it to your favorites easily.


This layout has been added to your favorites more than any other layout in the SC community gallery for the week of 9/12-9/18.

Congratulations Mandy! Because of this you have won a $10 gift card to be used on any new purchase at Studio Calico.

Want a chance to win next week? Be sure to upload your projects to the SC gallery, and support your community by adding special projects that catch your eye into your favorites! It could be YOU next week!


Sunday Sketch


This week's sketch is inspired by Vee Jennings' "New Look" layout from the Back 40 Gallery.
Notice how Vee used a scalloped sticker along the complete right side of her layout. This could easily be adapted to use a corner punch and some patterned paper as well. Vee used 3 photos sized to 2x3". To learn more about resizing photos, check out Susan's tutorial.

Now it's your turn. Take this sketch and make it your own for a chance to win one of two $5 Studio Calico gift cards. Make sure to link your layout to a comment in this post by Saturday.

Sunday Sketch Winners

by just g
using the Back 40 kit

by koostacy

Congrats to the winners! Please send an email to info@studiocalico.com with the following information:
  • Name:
  • Contest: Sunday Sketch 9/12
  • Prize Won: $5 Gift Card

Paper Bow Tutorial

This bow came into being because I needed a 3-D accent. I did a search and learned how to make them from a post on flickr that used magazine pages. Paper is a little different, but these are really fast to make and can add a fun happy look to your pages or cards. OR... you could actually make it for a present topper. :)

You'll need a paper cutter, liquid adhesive and a pair of scissors (optional). Here's a step by step for you:
  1. Cut 4 strips of 12 inch long paper. For this example I cut mine 5/8" wide, but you can experiment with the width.
  2. Cut three of the strips in half at the 6" mark. At this point, you'll chose which side you want showing. I wanted the ruler side of Harper's Ruler to show because I thought the variations would make for a fun bow. Notice how I marked and X at the 3" mark on the ruler side? That will guide where you put the spot of glue, right in the middle.

    3. Now comes the trickiest part of the process. You'll put a dab of the liquid adhesive on the X and then fold the end on the paper backward onto itself.

    Here's what it looks like from the front:
  3. Now you repeat the process with the other end of the same 6" strip.

    Here's what it looks like from the other side:
  4. Now you repeat the same process six (6) times. For the last two times, before you start the process, you'll want to cut about 1/2" to 3/4" off the strip to make the end loop a bit smaller than the first four. You'll have a group that looks like this, aren't they so cute in a row like that? Notice the two on the end are just a bit smaller. It makes it easier to put the bow together.

  5. Now the fun part, assembling the bow. Put a dab of glue in the middle of the first twist.
  6. Then start stacking, adding a dab of glue (this is why I use the Quick Dry Adhesive by Scotch 3M, it really is FAST. The first and second ones will nest nicely, the next four will not nest, they'll start the lift that you see in the end.


  7. The final step involves cutting a small piece of the strip, mine was 2.5" long, gluing the ends together and inserting it into the middle of the bow, attaching with one last dob of liquid adhesive. 
  8. Then you can use the bow in any manner you'd like, on a layout, a card, or another project. The bow will smash when you put your layout in an album, but that just leads to the personality of the project in my opinion. I hope you have fun with this project!