June 29, 2010

Inspired by Lisa D

Lisa Dickinson's new ebook is amazing. It's my first ebook and I love it. It's full of awesome design concepts and clear cut explanation of her layouts. Beginner to novice, you'll surely find some great ideas while flipping through this well designed ebook.
Here are the last of the inspired layouts.
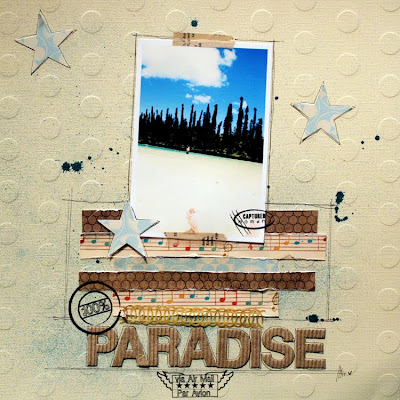
April's inspiration sparked by using text as a focal point. My eye definitely zooms in on the text, then gradually moves up to that cute photo.


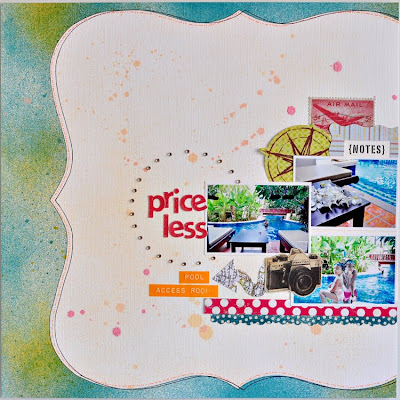
Maggie's inspiration comes from the chapter about achieving unity by creating a grid. One of my favorite design concepts and a smart one to boot. Maggie worked it perfectly.

Oh so creative Celine actually created her layout based on Nicole Harper's layout in the newest Ella Publishing ebook, 8 is Enough featuring April Foster and a few other familiar faces here at Studio Calico.


Sasha and her master spritzing skills used the color combination section of the book as her jump off point. That's what I notice first, beautiful bold color.

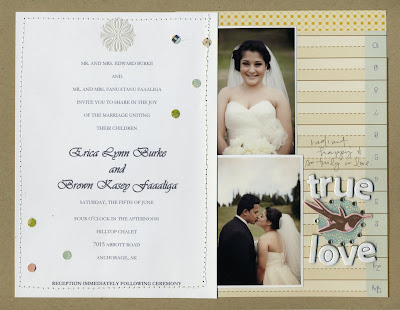
And lastly, we have my layout. I wanted to choose a part of the ebook that was most challenging and that has been to incorporate memorabilia. I always keep it...invites, holiday cards, and other paper items from parties but I always fail to use. I really wanted to change that about my scrapbooking and I'm glad Lisa's book finally knocked me out of my comfort zone.
That's it! Now it's your turn. Head over to Ella Publishing and download Lisa D's Design Workshop ebook. Get inspired and start creating those layouts you want to achieve.


Tutorial: Saving Your Favorite Splats, Splotches & Swoops For Future Use!

Tools needed:
Camera or Scanner
Paint, Ink, Mist, Tea... Whatever Floats Your Boat
Photo Editing Program
*this tutorial was done in Photoshop CS5 but will be applicable to all the CS versions and most Elements versions

I know that so many of you loved Tina's Paint Tutorial--myself included. I want to piggyback her fabulous tutorial with one that shows you how to keep those fantastic paint splotches for future use. Especially handy when you don't have the time or space to get messy.

It all starts with making some 'bases'. I took some mist, some paint, a marker and a cup of tea and made my shapes for examples. I tried to keep them simple for the basis of this tutorial. What happens next depends on whether you prefer to photograph your shapes or scan them in. I scanned each of mine individually.

(Scan at 300 dpi in RGB color)

I then opened them up in Photoshop and went to IMAGE>ADJUSTMENTS>DESATURATE. My mist splat now looks like this:

I like to play around with the Brightness/Contrast at this point to make the splat fairly dark and the white pretty bright. To do this IMAGE>ADJUSTMENTS>Brightness/Contrast and move the sliders to your liking. As you can see, it will lessen the fine mist portion considerably, which will make the next step much easier.

Now, make sure that your layer is unlocked. If there is a little lock icon it is locked, in that case you'll want to go to LAYER>NEW>New Layer from Background.

The next step is choosing your Magic Wand Tool (with the setting for 'add to' clicked), and your Tolerance Level. I kept mine fairly low for the purpose of this tutorial--I believe default is 32, but I bumped mine down under 10.
Find a good dark place in your splat and using the Magic Wand Tool, select that portion, you should get your marching ant outline around your selection . When you have a little selection go to SELECT>Similar and you will see more area become surrounded by marching ants. You may need to do this several times.
If you go too far, you will notice your white area becomes selected. You can either Ctrl+Z to go back one step or Ctrl+D to lose the selection and start from the beginning.

Once you have a happy selection going you can go to SELECT>Inverse and then hit your delete key. You are now looking at only your mist splat and perhaps a transparent checkerboard background. This means...You Did It!! The hard part is over.

Sometimes, a good selection is a little harder to come by. That's ok, because you can use the handy eraser tool and do

some touch ups to anything you'd like to get rid of. Case in point, the tea rings--they had a lot of little bits that had soaked into the textured paper, so I used a middle sized round eraser with a hard edge and just erased out the parts I didn't want.

You're probably wondering the best way to save and use these bad boys. I prefer to save them as a .png file--because it will save the transparent background. 300dpi at the original scanned size is the way to go. This way you'll have a nice big image to work with.


Wait...how did I color them in? A simple and very useful trick, really. Down at the bottom of the tool bar where the color palette hangs out there are two boxes, foreground color and background color. If I select a background color and select my layer by hitting the SHIFT+CTRL+DELETE keys it will colorize my selected layer.

Now, when I'm ready to make a layout, I have all these wonderful .png files I can open up and drag onto my canvas. I can layer them, I can color them, I can basically print them onto my background. I can envision using them on tags, on cards, on journaling blocks...all with a few mouse clicks.


If you have any questions, please don't hesitate to ask or email me. I'd love to see you succeed with this technique!

Some helpful hints & reminders:

  • Scan at 300dpi, save at 300dpi in .png format
  • If you're photographing your splotches, import and crop to a large size that still retains quality at 300dpi
  • Also, when photographing your bases, get nice and close with even lighting.
  • You can make your splats/drips/splotches on smooth or textured paper. Paper with texture may be slightly harder to get good selections from, but the reward is a more irregular and natural looking digital.
  • Keep in mind the type of paper/cardstock you print your final design on will have an effect on the look as well.
  • By using different blending modes and opacities (see Emily's tutorial here) you can really vary the look and style of your splats and splotches. You can even use them on your photos for added texture and dimension.
June 28, 2010

Reveal Night Winners!

The winners of the Basic Grey Collection packs are.......................

Cappella:

tas said...

I would like Cappella ;)

June 26, 2010 4:20 PM


Max & Whiskers

lori said...

max and whiskers....but choosing is very hard....adorable

June 26, 2010 11:44 PM


Winners, please send an email to info@studiocalico.com with the following information:

  • Name:
  • Subscriber: y/n
  • Contest: Reveal Night Giveaway
  • Prize: (Cappella or Max & Whiskers)

More Inspiration from "Design Workshop"

If you haven't downloaded Lisa Dickinson's ebook Design Workshop, do it now! You can get it here. It's fabulous...full of awesome eye candy from Lisa of course AND full of great, practical, easy ways to step up your scrapping designs.

This month the DT decided to take inspiration from Lisa's book and incorporate it into one of our designs. I decided to follow her tip about using grids. I loved that she pointed out grids can be more than just rows and columns of blocks. Circles, hearts, stars... all grids! :) Here's my take on that idea.
Stephanie H. also drew inspiration from the grid idea, but her end result is totally different from mine. Love that!
Lisa drew on Lisa D's idea that sometimes you have to bend design "rules" to accomplish your end goal. Love Lisa's cluster of photos and how perfect that she got to use that Swing card!

Nicole H took inspiration from Lisa's tips on using patterned paper effectively. The end result is gorgeous!

Waleska's page also uses the patterned paper tips in the book. I would tell you what they are... but Lisa D does it way better in the book herself! ;)


Tina will be posting some last DT pages tomorrow. Night!

Design Team Layouts Inspired by..."Design Workshop" by Lisa Dickinson

I've long been a fan of Lisa Dickinson's clean, elegant style. Needless to say, I was excited when we decided that for July's kit, the Studio Calico Design Team would use inspiration from Lisa's book, Design Workshop, for one of their layouts. This e-book is full of color and classic designs. It was hard to choose just one concept to be inspired by!

For my own page, I was inspired by Lisa's concept of achieving unity through a grid. I've always been a fan of grids - they sound pretty formal, but you can make a grid out of anything - from circles, to lines, to butterflies! Here is my page, which I used a simple circle punch to create:


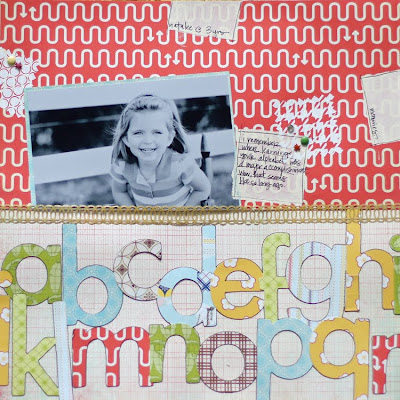
Kelly was also inspired by the idea of using a grid, which she achieved with cropping her photos and the more "decorative" square. Her page is quite different than mine, so you can see how inspiration can transfer from one style to the next! I love this kid's smile, but Kelly's page is just awesome:


Another of my favorite ideas Lisa had was to cluster accents - a favorite technique of mine, and one that Joy used so well on this page (and seriously, could this photo BE any cuter?):


Stephanie W. was also inspired by Lisa's idea for clustering accents, as well as her ability to layer items on the page (I love the page AND the shoes!):


Finally, one of my personal favorite design tips of Lisa's was to use memorabilia on your pages. This is such an important aspect of scrapbooking to me, and I love it when other's encourage it as well. Emily did just that, incorporating a piece her son wrote for school on her page (I love how his paper takes up the entire left page of this two-page spread):


Stay-tuned for more Design Workshop inspired layouts this week!

Don't forget to be inspired by other Ella eBooks, including the brand new Eight is Enough which features Studio Calico designers.

June 27, 2010

Final Round Up of Favorites!

Here are the last of the results from my Design Team Survey!

Today it is all about some of the fun things we love and hopefully this gives you
a chance to get to know each of us a little bit better!

Nicole S:

Favorite Camera Lens: 50mm 1.8
Favorite Time of Day to Scrap: I'm most productive in the mornings, but my kids don't really allow that, so whenever I can fit it in. My least favorite time to scrap is at night. I just don't have the energy!
Favorite Technique Right Now: Not really a technique... but I am really using punches a lot now.
Favorite Color Combo: pink and green :)
Favorite Music: I keep listening to Somewhere Over the Rainbow by Israel Kamakawiwo'ole lately. My kids love it too.


Celine:

Favorite Camera Lens: 50mm 1.4
Favorite Time of Day to Scrap: morning
Favorite Technique Right Now: sewing
Favorite Color Combo: blue, grey, yellow, white
Favorite Music: Arctic Monkeys


Joy:

Favorite Camera Lens: 50mm
Favorite Time of Day to Scrap: late night
Favorite Technique Right Now: today I used stickers as a mist mask, that was fun :)
Favorite Color Combo: it changes all the time, but right now my all time fave is still grey and yellow; throw in a little aqua or red and its perfect
Favorite Music: um, on Pandora I listen to Old Skool Hip Hop like Waterdeep and Owl City too. In the car I mostly listen to NPR or classic rock.


Jenn:

Favorite Camera Lens: 85mm
Favorite Time of Day to Scrap: evening
Favorite Technique Right Now: what makes for a technique? the word confuses me. :)
Favorite Color Combo: blue and red
Favorite Music: anything with a great melody and a story/meaning


Davinie:

Favorite Camera Lens: 50mm
Favorite Time of Day to Scrap: any time when my kids let me
Favorite Technique Right Now: stitchery!
Favorite Color Combo: brown, pink, blue and a hint of orange
Favorite Music: Jason Mraz station on Pandora


Laura:

Favorite Camera Lens: 50mm 1.4
Favorite Time of Day to Scrap: anytime after bedtime
Favorite Technique Right Now: sewing. on everything. if it needs to be adhered, I sew it.
Favorite Color Combo: brown and blue
Favorite Music: country


April:

Favorite Camera Lens: 50mm 1.4
Favorite Time of Day to Scrap: whenever I have time
Favorite Technique Right Now: I've really been enjoying my Slice lately. I'm a latecomer to the whole die cut phenomenon.
Favorite Color Combo: pale blue, yellow, orangey-red, lime green
Favorite Music: Jason Mraz............. ahhhhhh


Emily:

Favorite Camera Lens: 50mm 1.4
Favorite Time of Day to Scrap: weekday mornings
Favorite Technique Right Now: machine stitching
Favorite Color Combo: orange. there is no other color
Favorite Music: sister hazel station on pandora


Tina:

Favorite Camera Lens: 50mm 1.4
Favorite Time of Day to Scrap: Friday night
Favorite Technique Right Now: Creating backgrounds with watercolor crayons
Favorite Color Combo: blue and yellow
Favorite Music: indie/alternative


Kelly:

Favorite Camera Lens: 50mm 1.4
Favorite Time of Day to Scrap: late night when there are no distractions ;)
Favorite Technique Right Now: I'm not really verry technique-y, so I don't know. lol
Favorite Color Combo: red and turquoise
Favorite Music: I love everything, but singer/songwriter types probably my fave


Stephanie W:

Favorite Camera Lens: 50mm 1.8
Favorite Time of Day to Scrap: at night - all night if possible
Favorite Technique Right Now: misting
Favorite Color Combo: chartruese + grey, yellow + grey, pretty much anything with grey
Favorite Music: James Taylor, Ray LaMontagne, Bluegrass - pretty much any hot guy with a guitar


Lisa:

Favorite Camera Lens: 50mm 1.8
Favorite Time of Day to Scrap: 9am, with a McD's diet coke in hand. Doesn't work as well in the summer as it does during the school year
Favorite Technique Right Now: stitching
Favorite Color Combo: grey + yellow + almost anything
Favorite Music: Counting Crows


Waleska:

Favorite Camera Lens: 24-70mm
Favorite Time of Day to Scrap: whenever kids give me a break :)
Favorite Technique Right Now: inking/layers? I dunno. that's the last thing I did so I'm going with it :)
Favorite Color Combo: turquoise/red
Favorite Music: I don't know... I listen to whatever


Nicole H:

Favorite Camera Lens: 50mm 1.4
Favorite Time of Day to Scrap: afternoon... when I'm alone in the house
Favorite Technique Right Now: I edge lots of stuff on my pages with paint.
Favorite Color Combo: yellow + grey + red = :)
Favorite Music: Pop/Hip Hop :)


Stephanie H:

Favorite Camera Lens: 50mm 1.8
Favorite Time of Day to Scrap: mid day when my girls are napping - I need sunlight :)
Favorite Technique Right Now: my favorite technique is not doing techniques. HA
Favorite Color Combo: turquoise and yellow
Favorite Music: female singer-songwriters


Sasha:

Favorite Camera Lens: 50mm 1.4
Favorite Time of Day to Scrap: quiet time, I take what I can get.
Favorite Technique Right Now: splatters of ink/mist, misting
Favorite Color Combo: yellow, teal, white
Favorite Music: Lady Gaga *grins*


Maggie:

Favorite Camera Lens: 50mm 1.4
Favorite Time of Day to Scrap: anytime that I can get... sometimes it's during the day when emily naps and sometimes it is at midnight!
Favorite Technique Right Now: Misting and making fabric/felt flowers
Favorite Color Combo: turquoise, pink, yellow, white
Favorite Music: Emily and I love jamming out to Taylor Swift! We dance and sing at the top of our lungs! But I also love singer/songwriter types too.

Layout of the Week


The layout of the week is brought to you by Kaori Wantanabe (chelseavn), featuring the Documentary collection. This collection is currently available at local stores or other online retailers, and will be available to purchase at Studio Calico on July 14.
Each week, the layout in the gallery is linked, so you can add it to your favorites easily.


This layout has been added to your favorites more than any other layout in the SC community gallery for the week of 6/20-26.

Congratulations Kaori! Because of this you have won a $10 gift card to be used on any new purchase at Studio Calico.

Want a chance to win next week? Be sure to upload your projects to the SC gallery, and support your community by adding special projects that catch your eye into your favorites! It could be YOU next week!


Sunday Sketch


A cute photo + strips of torn patterned paper = design genius by Mou Saha. This week, her "Home Alone" layout is the source of inspiration for our Sunday Sketch. Notice how Mou used a 4x6" focal photo (a funny one at that!), then tore various papers in 1-2" strips. It's a very organized page that looks very fun.

Now it's your turn! Take this sketch and modify it any way you'd like, or use it as is. Then, link it here to this post by Saturday for a chance to win one of two $5 gift cards.

Sunday Sketch Winners

by Karen


by rosalie

Congrats to the winners this week! Please send an email to info@studiocalico.com to claim your prize. Don't forget to include the information below:
  • Name:
  • Contest: Sunday Sketch
  • Prize: $5 Gift Card

June 26, 2010

tutorial : stitched circles


(items from June's Partly Sunny and add-ons + lemon mist + mustard seed ink + tiny attacher + pinking sheers)

Hi all! I'm sneaking in on Kelly and Maggie's favorites weeks to give you a few pointers on one of my favorite techniques - stitching. More specifically - stitching circles. This is a technique that takes a bit of practice but it's well worth it - I love the sense of movement that large stitched circles can add to a background, and stitching smaller circles can add a lot of texture and detail to your page.


(Collage Press + Jenni Bowlin Studio)

Since stitching larger circles is definitely easier, let's work on that first. Both of the above pages have large circles stitched on the background. I started them the same way - by laying out a circle template and tracing the circles onto my background with pencil. I tend to use my Fiskars USX templates, but if you don't have something similar, head to your kitchen. You'll find a multitude of perfect circles in your cabinets - search through your plates, bowls and cups until you find one that's the right size.


You'll want to have a rough idea where your other elements will be - there's nothing worse than adding in your photos and patterned paper and realizing that all of your hard work is now hidden!


You'll also want to make sure that your circle is the right size to accommodate any elements that you're planning to arrange around it.


Once you've got your circles drawn in pencil, it's time to sew! Go SLOW. You can always speed up, but it's easier to get a feel for how you need to move the paper when you're maching is going slow. I use one hand to guide my paper - you just want to steer it gently, and be sure not to push or pull it. If you push or pull too hard you can pull your needle out of it's natural position for the stitch you've selected, and it's going to hop back to where it's supposed to be the second you stop applying pressure.


When that happens, you'll end up with odd lumps around your circle, as you can see in the biggest circle on this example. What you're aiming for is the circle in the middle - the lines are smooth, and you can't even see the pencil lines. The smallest circle shows an easy fix for a stitch job with a few mistakes - add a couple more circles and your mistakes will all even out. ;)


(Studio Calico Documentary + Cosmo Cricket Joy Ride chipboard - available in the shop on 6.27 at noon EST + tiny attacher)

Once you get comfortable with big circles, it's time to start experimenting with little ones. I started this card with a circle punch, and arranged strips of paper around it to make a sun.


You'll stitch around small circles with the same technique that you used for larger ones - but go even slower. And chances are, you're going to make mistakes. I rarely manage to get a good clean circle when I'm working in the under 3in diameter ranger. This was not one of those times. =)


So I went around a couple more times and called it good. ;)

I'm hoping to see more circles popping up in the gallery - please link me up if you give it a try!


Reveal Night Giveaway


Reveal night is twice the fun with 2 chance to win!

Just leave a comment here letting us know which collection, Max&Whiskers or Cappella, you'd like to win.

Winners will be chosen Monday!

Design Team Favorites

Hi there! I am back with some more Design Team favorites to share with you!

I polled the design team to find out about some of their favorite scrapping supplies...

Here's what I found out!

Favorite Mist Colors:

Sunflower, Cream, Turquoise, Hydrangea, Bubblegum Pink, Lemon, Charcoal, Lime Green

Looks like we covered most of the rainbow on this one!
They can all be found in the shop right here.

Favorite Ink Colors:

Stazon Brown and Black, Grey, Barn Door, Antique Linen, Mustard Seed, Broken China, Spiced Marmalade, Pumice Stone, Tumbled Glass, VersaFine Onyx Black, Chalk Ink in Creamy Brown
Inks are found in the shop here.
Good old black was a fave for lots of us!

Favorite Punches:

2.5" Circle, Star Punch, Hydrangea, Bumpy Road, Scallop Sentiment, Photo Labels, Martha Stewart Butterfly, Any Circle, Martha Stewart Flying Bird, Upper Crest Border, Optic Dot, Modern Garland, Apron Lace

Some of these are good classic standbys for all of us!
And some of these newer ones I don't have yet... looks like I need to go shopping! :)

Favorite Studio Calico Product:

Journaling Lines Stamp, Hot Air Balloon Stamp, Back Side of Camera Shy Paper, All the Stamps!, Stamps from the Magellan Add-On in July Kit, Banner/Today Stamp Set from Partly Sunny Kit, Documentary FAbRips, All Fabrips and All Stamps, Periodical Paper from Anthology Collection, Polaroid Frame Rub On, Documentary Journaling Cards, Documentary FabRips, Anthology Rub Ons, The New Stamps for CHA (a little teaser! :) ), All of the Stamps and Papers, the B side of Window Seat, Doily Banner Patterned Paper, Souvenir Paper from Documentary, Noah Alphabet

As you can see we are all over the board again on this one!!
Lots to love because all of the SC products tend to blow us all away!
And I can't wait for you all to see what's up next for CHA! So much fun!!

Will be back soon to share the final results from my design team survey! Stay tuned!

June 25, 2010

Gallery Favorites

Kelly here...I'm reporting from the beach...thank goodness for free wi fi in the hotel. :) Anyway, I'm here with few favorites from the gallery. If you haven't had time to peek through the gallery lately, be sure to check it out...there are some amazing and inspiring projects over there!

A perfectly done simple layout by armance...


I love the way keshet kept everything in the center here....
Check out this incredible layout by sarbear.....so artsy and fun!

I'm looking forward to peeking at all your "Favorite" challenge layouts when I get home on Sunday...I'll be sure to draw a winner then and let you know who the lucky winner of the $5 shop GC is! :)

June 23, 2010

Favorite Trends

There are so many fun trends out there in the scrapbook world right now. To be honest, I try not to get *too* trendy in my scrapping, but always try to throw in a bit of the trends without going overboard. I think it's really important to evolve with the trends all the while staying true to your style at the same time. A couple of my most favorite trends are banners and misting. Here are some fun examples I've spotted in the gallery...

Here's an example of taking a trend and putting a creative twist on it...kobakyon misted a banner onto her gorgeous layout...
I love Jennifer L's layout featuring both of my favorite trends...how fun is that misted flower w/the journaling?!!
Megan Klauer uses a lot of mist here, but in such a fun whimsical way...love the misted clouds with the pen detail!
I love Chelseavn's funky style....she uses mist SO well!
What are your favorite trends? Any trends you're tired of seeing these days? I'd love to hear!

June 22, 2010

Outside Inspiration

This week is all about favorites so I thought it would be fun to survey the Design Team and share some of our "favorites" with you!

First up is our favorite sites for outside inspiration...

There is a world of inspiration out there to be feasted upon! Most likely you have heard of some of these sites but some may be new and they are definitely all inspiring! So, grab a snack or a cold drink, sit back and click away... and most importantly be inspired!!

April, Stephanie and Stephanie's favorite:

Sasha, Laura, Jenn, Joy and Nicole's favorite:

Waleska's favorite:

Lisa, Kelly and Emily's favorite:

Tina's favorite:

Davinie's favorite:

Celine's favorite:

Maggie's favorite:

Enjoy!!!!!!!!!!!!!!!!!!!


SC + Ella


What do you get when you dare five designers to create four layouts with only eight supplies? You get inspired!

In Eight is Enough: Easy ways to stretch supplies and use leftovers, we teamed up with Ella Publishing for a little experiment. It's one thing to create stunning projects when you have a large, beautifully coordinated kit to work with. But it's quite another when you only have eight total supplies at your fingertips, and you've been challenged to stretch them as far as you can. Can it be done?

Absolutely! And the results will amaze you. 5 Studio Calico design team members: April Foster, Nicole Harper, Stephanie Howell, Kelly Noel, and Lisa Truesdell demonstrate just how far eight can take you. Check out our pages, then soak in the 54 tips, tricks, and techniques that will help you make the most of your supplies. Get ready to stretch!

June 21, 2010

Weekly Challenge: Your Favorite!

Maggie and I are hosting the blog this week. We have a fun and SUPER simple challenge for you this week. Just do something that's a favorite for you....a favorite photo, a favorite technique, a favorite product, favorite color combo...you get the idea. :) It doesn't get much easier than that, just make sure when you post your layout to specify which "fave" of yours you used. The only catch is please create something new just for this challenge. :)

I'll be back later this week to share my layout for the challenge. Be sure to post yours to the member gallery and I'll start a thread on the MB for you to link up there. Thanks for playing along! We look forward to seeing what you all come up with!

June 20, 2010

Sunday Sketch

We have a quick, easy, but brilliant sketch this week inspired by Laura Kurz. This layout is 8.5x11" and features a 4x6" photo, but could easily be adapted to a 12x12 page and a larger photo or several smaller ones. Laura chose several different patterned papers to punch heart-shapes from and then centered her title on top of a grouping of them underneath her photo.


Now it's your turn. Take this sketch and make it your own and link to this thread. Deadline is Saturday. On Sunday, 2 winners will be chosen to win $5 gift cards, then a new sketch will be posted. Have fun!


The layout of the week is brought to you by Geralyn Sy (qingmei), featuring the Storytime Alpha Stamps. This item is currently sold out but will be back in stock by the end of the month.
Each week, the layout in the gallery is linked, so you can add it to your favorites easily.


This layout has been added to your favorites more than any other layout in the SC community gallery for the week of 6/13-6/19.

Congratulations Geralyn! Because of this you have won a $10 gift card to be used on any new purchase at Studio Calico.

Want a chance to win next week? Be sure to upload your projects to the SC gallery, and support your community by adding special projects that catch your eye into your favorites! It could be YOU next week!


Please note, winners are not allowed to win more than once in a four-week period.
Winners are not limited to those using Studio Calico kits.