
2. Go ahead and select the photos you want to use so that they show up in the large window. Press control when you click to select multiple photos. Then you want to select your output options in the window on the right. You can see what I set mine to. Choose "PDF file" and 5*8 contact sheet in the template menu.

3. Hit "refresh preview" to see what you've created. You'll see that the files you selected in step #2 are now mini index prints set on a A4 sized paper. (8.5x11) That's the default sizing and if you like that....you are good to scroll down to the bottom of the right bar and find that little save button. Just save and print.
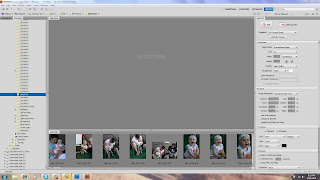
4. However, if you'd like to create index print sheets that would fit into the CD/DVD case the files are actually saved on, you need to change a few of the default settings. In the "Document" section in the bar on the right, choose custom for your size and enter 12.2 cm by 12.2 cm for the dimensions. (See my screen shot below). Then go down to the next section in the right side bar called "Layout" and enter 5 in the columns box and 7 in the rows box. Finally, make sure "auto spacing" and "rotate for best fit" are checked. Refresh preview again and viola! (Scroll all the way down to the bottom of the right bar to find that save button and save to print.)

Not too hard, right? :) Now, if you don't have Bridge or you'd rather do this in plain old Photoshop, you do the following:
1. In the "file" menu, select "AUTOMATE" and then "CONTACT SHEET II".
2. A box will pop up. This is where you select your file you want index prints from.
3. Also in this box you need to input your settings for the prints. Choose the size of paper (again, A4 is the default... if you want to fit the print inside the CD jewel box, change this to 12.2 cm x 12.2 cm), the orientation, the resolution (300 dpi is good for print) and the number of prints in each row and column. For the CD jewel box size, set column to 5 and row to 7 again.
4. Click OK and photoshop will go to work!
5. Print.
Hope this was helpful. Let me know if you have questions about this... I just learned it today myself and I'm no photoshop expert...but I will try to help!


2 comments:
THANKS for the tutorial!! Can't wait to try it!! Have a GREAT DAY!! Larissa Heskett
I just want to say "I love you" for this!
Post a Comment