
I found that the best way to get even color was to brush my tape with water first. I love this brush set - they are priced well and the brushes hold up beautifully over time. You can use the tape full size or cut it to a smaller width - I had no problem using my paper trimmer to cut it.

Next, I sprayed the tape with mist. I used hydrangea on this piece. After I misted, I used my paint brush again to spread the mist evenly. You could also leave it as is, and get a more of a gradient color wash - the point closest to where you sprayed would be the darkest, and it would fade from there. If your color is too dark, blot it with a paper towel and you can remove some of the mist. If you're happy with the color it's time to let it dry. It took about twenty minutes for my tape to dry completely, but if you're in a hurry, I'm sure a heat gun would speed up the process!
Now comes the fun part - adding patterns with stamps. The sky's the limit here - you can go for a tone on tone look, or experiment with something a little more bold. After I stamped, I used my tapes on a quick card - and of course I had to keep with our travel theme for the week. =)
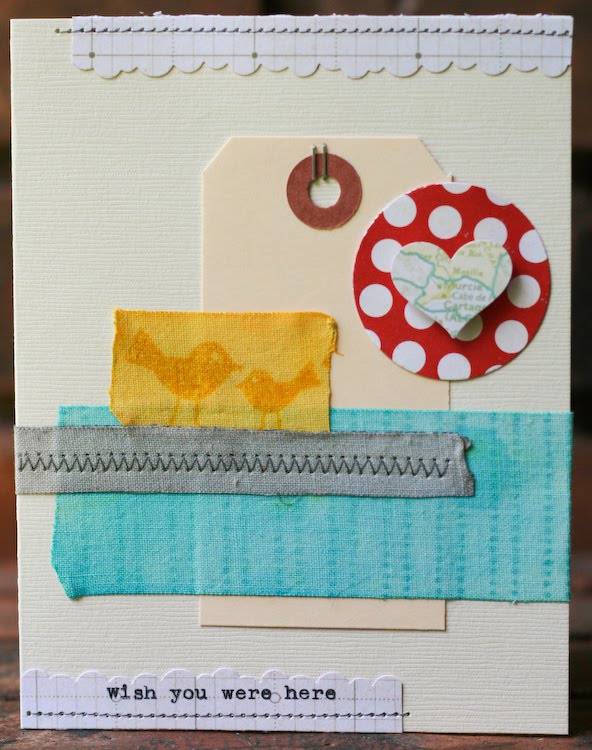
(supply list : vanilla cardstock, jetset pp, window seat pp, girl's paperie pp from the july kit, hydrangea mist, lemon mist, charcoal mist, tumbled glass ink, mustard seed ink, journaling lines stamp, tweets stamps, tiny attacher, bumpy road border punch, foam adhesive, shipping tag, fiskars heart and circle punches, typewriter)
The best part of this? The roll of fabric tape cost me $2.79 - I had everything else on hand. Now I can have tape that matches any project for a fraction of what washi tape would cost. I can't wait to experiment more with this technique.


14 comments:
FANTASTIC!!
That is so much fun! LOVE this idea!
xx
Loves,
K
Excellent idea! I think I'll see if I can do something similar with masking tape. :)
Awesome tutorial Miss Glue! I was just having the same thought. :) I'm teaching a mist class at my lss, and did a similar technique!
love this tutorial, lisa!
thanks for sharing!
=^ . ^=
crazy goodness !~ love your projects =)
I LOVE washi tape and can't wait to try this! Thanks!!
bello
Very cool, will have to pick some up.
Oh, I love this!!!
Wow...fantastic idea!!Love it!
Tried this & loved it! Had to use an ink pad b/c I only have one mist-must get more mist, must get more mist
LOVE it! Adds a cool fabric like texture, can't wait to to steal this.
Love the card, great job! Thanks for linking back to my tutorial ;)
Post a Comment