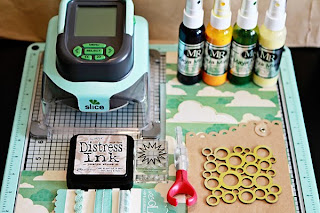
- Use Stamps
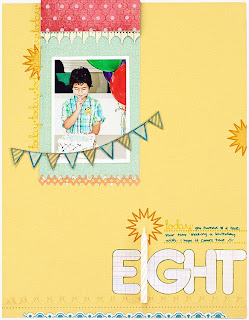 On this page from the Continental gallery, I colored the inside of the mini starburst with mists by creating a template using the same stamp.
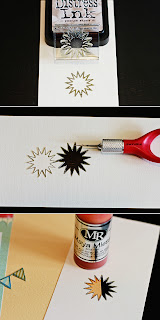 1. Stamp the starburst on a scrap piece of paper
2. With a craft knife cut the inside of the stamp
3. Layer the template on your page and mist with gold
4. When it dries, stamp on top of the image with distressed inks (i used wild honey)
- Use Patterned Paper
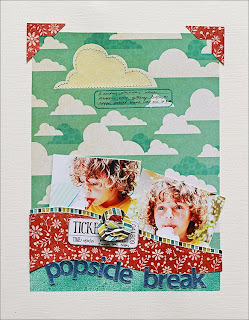 Here, I used the Scattered Clouds paper from Adirondak both as a design element and a tool.
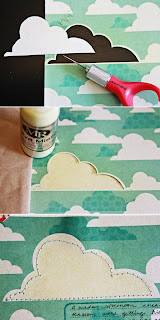
1. With a craft knife cut out one of the clouds (the big one)
2. Layer it on top of the paper (cover the area around it with a paper bag)
3. Mist with buttermilk or cream
4. Sew around it for more definition
- Use Packaging
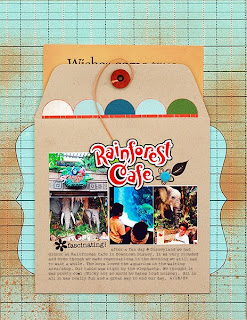 This is one of my first (and fave) misting layouts. I made it with Playground. Remember Playground? I still love that kit! Anyway, for the background I used the JBS chipboard buttons packaging from Soda Fountain. I just placed it on top of the blue paper and sprayed with orange mist.
You can also use the negative space by tracing and cutting out the shape. I did that on my class clown layout from the Joyland gallery. There, I used the MME ribbon packaging. Super simple.
- Use Embellishments

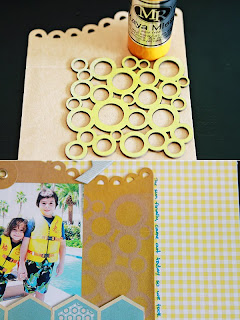 This is an easy one. Just pick any embellishment you like and mist over. Of course, the more interesting the shape (like this bubble chipboard from Granny's Cupboard) the better. Chipboard envelops and buttons work well.
- Use a Die Cut machine
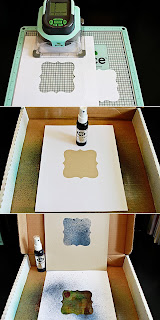
Another fun and easy one (if you have a die cut machine, that is). I love this one the most because of the endless possibilities. You can cut different shapes in different sizes, letters, words, etc. When using my Slice to create a template, I use regular paper (and because I scrap 8.5x11 it works perfect for me).
1. Select and cut out the shape
2. Layer the paper on top of the cardstock or paper your scrapping with
3. Mist
Easy peasy, right? :)


9 comments:
I'm looking forward to trying this later.=]
i am just starting to feel more comfortable with misting!! can't wait to try these techniques- thanks!!!
I'm loving mists right now. I've been using my Slice to that too and it is so darn cute! Use that same label the most!
Thanks, Waleska.
I'm trying to be less intimidated by mists.
great tips !~
bello questo tutorial,grazia
thanks Waleska! great tips :)
Great ideas. I just got a slice I'll have to cut some shapes and give this a go!
Grreat reading your blog post
Post a Comment