Hi there! I am sneaking in this week to share another tutorial with you and this time we are making fabric flowers. I made these to go on a t-shirt that I was embellishing for my daughter, but you could do so many things with them.......
include them on a layout
use them to make a card for someone special
make them into hair clips
put them on a headband
use them on a necklace
use them in your art journal
spice up a boring scrapbook album cover.....
etc, etc.... you get the idea right? endless possibilities!
I will start by showing you the finished product
so you can see what we are making and then we will dive right in!
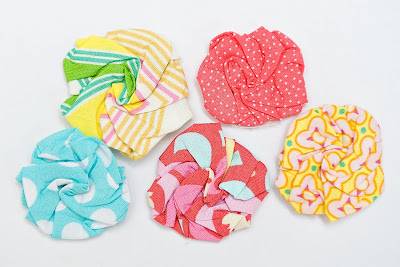
Aren't they cute? You have probably seen them before. And I want to point out that I definitely do not take the credit for making these up..... they have probably been around for years, even decades. So, all I am doing is passing along the info while also giving a shout out to the fabulous person that did come up with this -- whoever you are! Thank you!
Step #1
Cut your fabric into squares.
(I apologize for not having a picture of this step. I guess I got too excited & moved on before I could get one. oops!) Your squares can be any size depending on how big you want your flowers to be. Mine ranged from about 3.5" square to 5" square. I also want to point out that my squares were not perfectly square and they still came out fine. Some were a bit more rectangular because I was using scraps..... it will still work.
Step #2
Next you will want to fold pleats on the squares. You will create 3 pleats on each square. It doesn't matter if they are going away from you or toward you, just stay consistent so they all go the same way. I tried to space my pleats pretty evenly so they are spread across the square and not all toward one side. But again, you can see that I wasn't perfect with it and it all turned out fine.
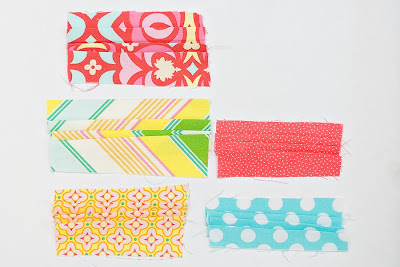
Iron the pleats into place so they are nice and flat and will stay in place. Here is a close up of the pleats so you can see it a little better. (now it looks like a rectangle)
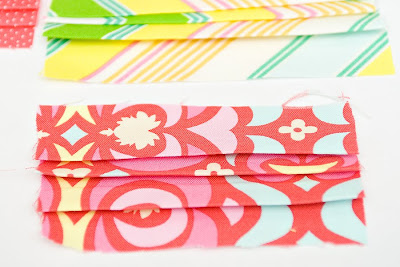
Step #3
Use a sewing machine to stitch down both sides of the rectangles. You want to stay pretty close to the edge (about 1/4") and you can use matching thread if you want, but it won't end up showing so you can also just use white like I did.
Step #4
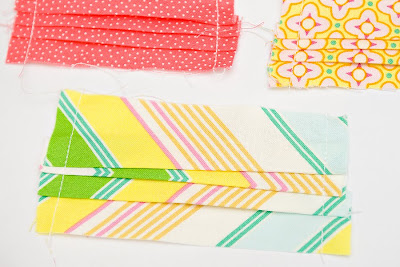
Now you will rotate the rectangles 90 degrees and fold 3 pleats in the other direction.
Again you will want to iron them down. This time around they won't want to stay as flat so you will want to use a pin to hold the pleats in place until you get them stitched down.
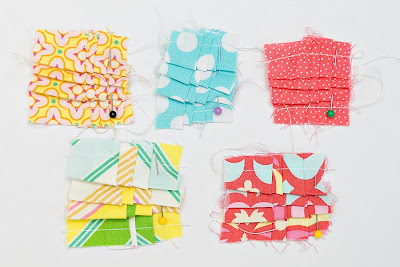
Here is a close up of my rectangles pleated in the other direction and pinned in place.
(now they look like squares again.)
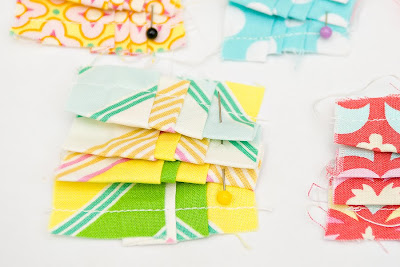
Step #5
Stitch down both sides again with a sewing machine. I found that the pleats go through the machine more easily if they are positioned with the pleats folded toward you like this.
Again, you can see that mine are far from perfect... some are crooked and some look far from being square but it is all good!
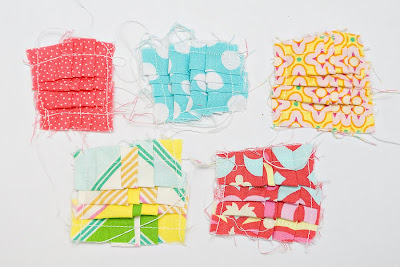
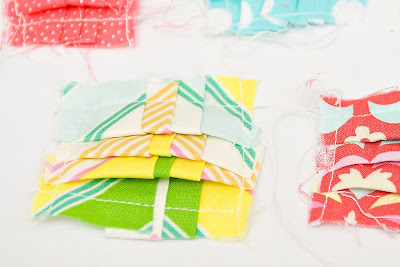
Step #6
Next you want to turn them into little puffs by opening them up and pushing the fabric up from the back. Basically you are ruining all of those beautiful pleats you just created by pushing them up and out. If you turned them over they almost look like little bags that you could fill with something.
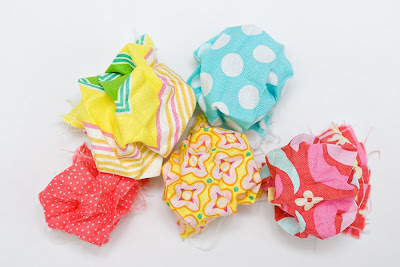
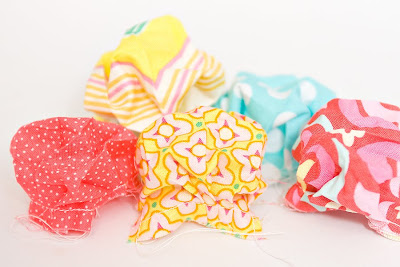
Step #7
Next is the trickiest part. You will hold onto the bottom of the puff with one hand and use the other hand to pinch the top of the puff in the center. Then twist your hands in opposite directions until you can't twist the fabric any further. Once you have it twisted you will smash it and make it flat. You will want to make sure your iron is hot and ready so you can iron it into place so it will stay in the new flower shape. You also want to make sure that you tuck in all of the raw edges at the back of the flower so they don't show.
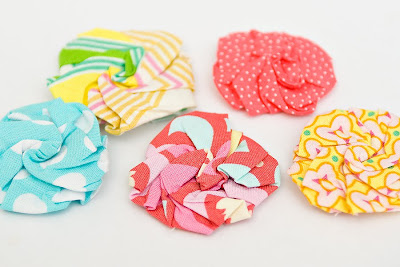
You can see that mine are a little different in size and they are also not all perfectly round. This is because they weren't perfectly square, which I think adds to the hand-made beauty of them.

A final tip is that you may want to use a matching thread to stitch the folds of the flower in place a little bit. You can do it discreetly so the stitches don't show and it will ensure that the flower doesn't lose its shape.
I will be back to share what I did with these in another post. For now I will let you get creating and dreaming up all of the fun projects that you will use them on! Have fun!


19 comments:
This is awesome. I am so, so going to do this. Great job, Mags!
these are great, Ive not ever seen theese type before at all!!
Fantabulous. You must have the patience of JOB. I need to give this a try.
So cute! So fun! And so easy! My kind of project... love it!
oh how fun! beautiful!! oh, these look so fun, i'm going to have to have a go!! thanks for sharing!
way too much fun maggie! i love these and will definitely be making a few dozen. i can do this sort of thing :) i love when i can copy :)
I've been dying to make some of these fabric flowers for my 2 little princesses! Thanks, so much Maggie! Great tutorial and I'm on my way to my fabric stash!!
OMGosh, who is going to make a butt ton of these and sell them on etsy.com LOL
I do not have a sewing machine so can not make this awesome flower!!!
I'd pay someone to make me some for scrapbooks, papercrafts, etc....
stampininnm@yahoo.com
AWESOME!!!!
Wow!
Thanks for putting together such a detailed tutorial. All the photos are very helpful!!!
this is awesome, thanks so much for the tutorial.
thanks for the tips/tricks!
these are great, thanks for sharing!
yay, more fun fabric flowers to make, thanks so much for the idea and the tutorial!!!
These are beautiful! Love the colors too. I saw them several months back here:
http://calamitykim.typepad.com/calamity_kim/fabric-flowers/
Love these! I am filing this idea at thecraftersfilebox.com.
Thanks so much for sharing!
I would love to see some ideas on how to use these on clothes. Any websites?
K...I tried and they aren't so easy! :) Well, it is till you come to the twisty part! That was very frustrating to me! Mine didn't come out so great. :( I will keep trying....any tips on the last step?
I love the flowers!! Thanks for posting it. Best regards,
wow. that was hard! i think it would probably be easier if i used a bigger square...
Post a Comment