Tools needed:
Camera or Scanner
Paint, Ink, Mist, Tea... Whatever Floats Your Boat
Photo Editing Program
*this tutorial was done in Photoshop CS5 but will be applicable to all the CS versions and most Elements versions
I know that so many of you loved Tina's Paint Tutorial--myself included. I want to piggyback her fabulous tutorial with one that shows you how to keep those fantastic paint splotches for future use. Especially handy when you don't have the time or space to get messy.
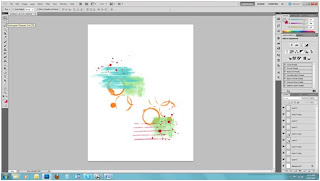
It all starts with making some 'bases'. I took some mist, some paint, a marker and a cup of tea and made my shapes for examples. I tried to keep them simple for the basis of this tutorial. What happens next depends on whether you prefer to photograph your shapes or scan them in. I scanned each of mine individually.
(Scan at 300 dpi in RGB color)
I then opened them up in Photoshop and went to IMAGE>ADJUSTMENTS>DESATURATE. My mist splat now looks like this:
I like to play around with the Brightness/Contrast at this point to make the splat fairly dark and the white pretty bright. To do this IMAGE>ADJUSTMENTS>Brightness/Contrast and move the sliders to your liking. As you can see, it will lessen the fine mist portion considerably, which will make the next step much easier.
Now, make sure that your layer is unlocked. If there is a little lock icon it is locked, in that case you'll want to go to LAYER>NEW>New Layer from Background.
The next step is choosing your Magic Wand Tool (with the setting for 'add to' clicked), and your Tolerance Level. I kept mine fairly low for the purpose of this tutorial--I believe default is 32, but I bumped mine down under 10.
Find a good dark place in your splat and using the Magic Wand Tool, select that portion, you should get your marching ant outline around your selection . When you have a little selection go to SELECT>Similar and you will see more area become surrounded by marching ants. You may need to do this several times.
If you go too far, you will notice your white area becomes selected. You can either Ctrl+Z to go back one step or Ctrl+D to lose the selection and start from the beginning.
Once you have a happy selection going you can go to SELECT>Inverse and then hit your delete key. You are now looking at only your mist splat and perhaps a transparent checkerboard background. This means...You Did It!! The hard part is over.
Sometimes, a good selection is a little harder to come by. That's ok, because you can use the handy eraser tool and do
some touch ups to anything you'd like to get rid of. Case in point, the tea rings--they had a lot of little bits that had soaked into the textured paper, so I used a middle sized round eraser with a hard edge and just erased out the parts I didn't want.
You're probably wondering the best way to save and use these bad boys. I prefer to save them as a .png file--because it will save the transparent background. 300dpi at the original scanned size is the way to go. This way you'll have a nice big image to work with.
Wait...how did I color them in? A simple and very useful trick, really. Down at the bottom of the tool bar where the color palette hangs out there are two boxes, foreground color and background color. If I select a background color and select my layer by hitting the SHIFT+CTRL+DELETE keys it will colorize my selected layer.

Now, when I'm ready to make a layout, I have all these wonderful .png files I can open up and drag onto my canvas. I can
If you have any questions, please don't hesitate to ask or email me. I'd love to see you succeed with this technique!
Some helpful hints & reminders:
- Scan at 300dpi, save at 300dpi in .png format
- If you're photographing your splotches, import and crop to a large size that still retains quality at 300dpi
- Also, when photographing your bases, get nice and close with even lighting.
- You can make your splats/drips/splotches on smooth or textured paper. Paper with texture may be slightly harder to get good selections from, but the reward is a more irregular and natural looking digital.
- Keep in mind the type of paper/cardstock you print your final design on will have an effect on the look as well.
- By using different blending modes and opacities (see Emily's tutorial here) you can really vary the look and style of your splats and splotches. You can even use them on your photos for added texture and dimension.


8 comments:
pretty nifty !~
Awesome tutorial!
is it too forward to say i love you? because i've known this was possible, but i've never attempted it and now i will. because of you.
stinking amazing!
OH. EM. GEE. This is AWESOME! I have PSE7 and have yet to really play around with it. It scares me a little - LOL! But I think that I might could even do this - your directions seem very clear! If I do, you'll be the first to know! :) ~Ann
Thank you! I've always wondered how to do this!
This is a really cool tutorial-- thank you! I have PSE7 and am only slowly learning it. I love getting new ideas like this-- hopefully I'll get to try it soon!
*Defintely* bookmarking this post!
Something for me to try. Thanks for sharing.
Post a Comment